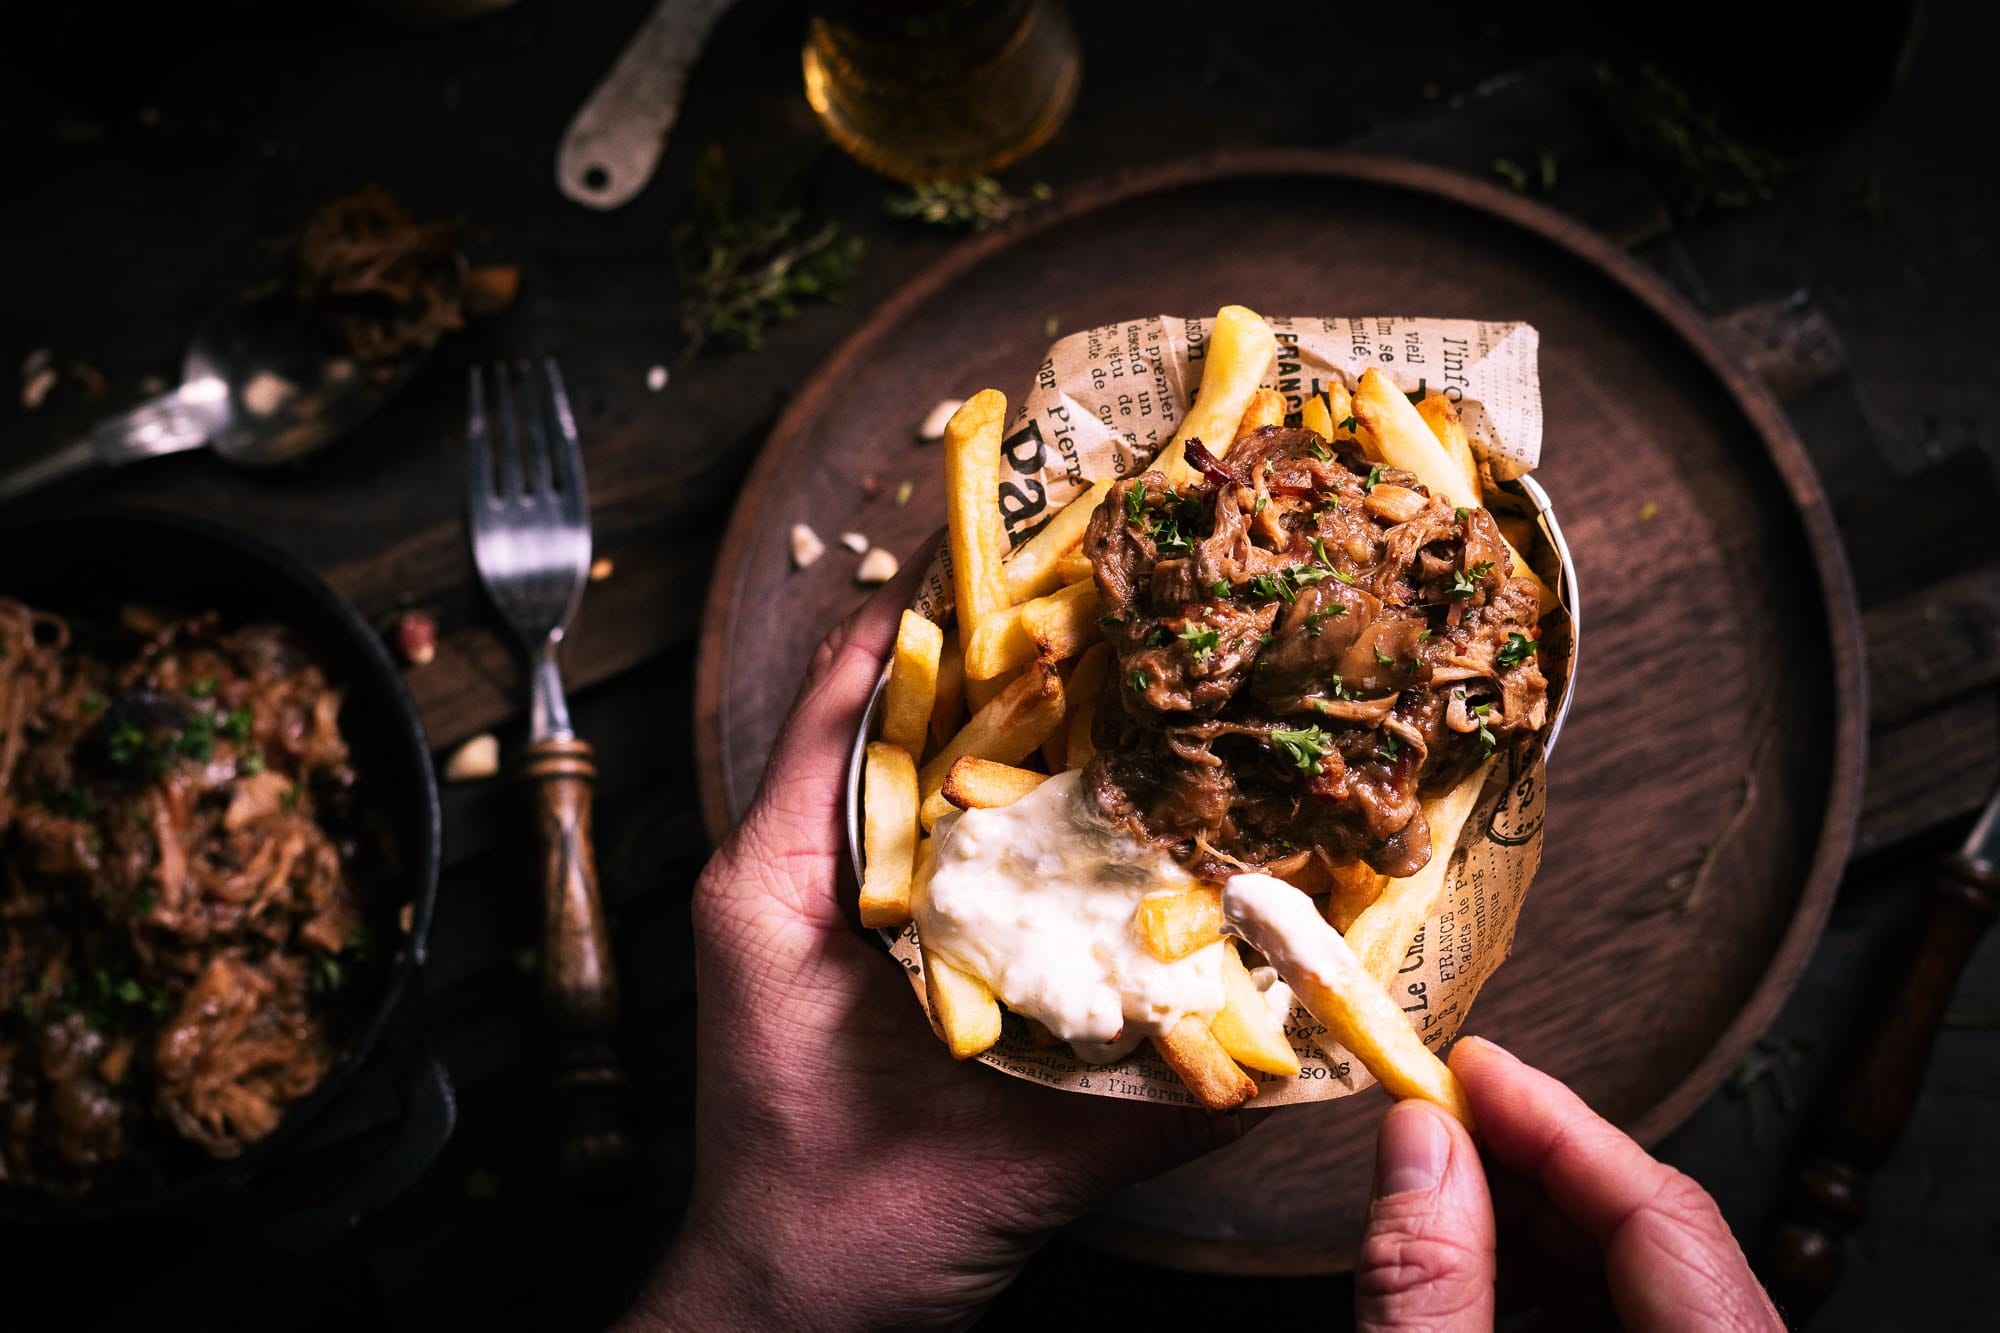
Do not call it just another pot of beef stew. The soul of this Flemish classic stays the same: good beef, caramelized onions and a thick slice of bread spread with mustard to turn the beer into a deep, glossy sauce. But grilling the beef before it goes into the Dutch oven adds the smoke and Maillard browning that a stovetop version can never quite match.
This post grew out of a paid social-media collaboration, although this article itself was neither required nor expected. It contains affiliate links. If you buy through one of those links, I may earn a commission at no extra cost to you. As an Amazon Associate I earn from qualifying purchases. All opinions are personal and honest.
For this cook, a bottle of Rodenbach Alexander went into the Dutch oven, a direct nod to the kitchens of my parents and grandparents. While I usually reach for a dark, heavy beer like St. Bernardus 12 or Rochefort 10 for a slighly sweeter result, traditional Flemish cooks rely often on Rodenbach for good reason. Its fruity acidity cuts right through the rich beef and balances the smoke from the grill, resulting in classic Flemish comfort food with a subtle smoky edge.”
Grill the beef and onions first, then braise them in a Dutch oven with Belgian beer, herbs, and mustard-spread bread. Plan for 3–4 hours, until the beef is melt-in-your-mouth fork-tender. Keep the grill lid closed throughout. Leave the pot uncovered to absorb smoke or reduce the sauce, then cover it once you hit the sweet spot. Maintain a gentle simmer, never a harsh boil.
What Is the Best Beef for Belgian Beef Stew?
For this beef stew, I use chuck roast or beef neck (often labeled as chuck roll in the US). The connective tissue in these cuts needs time to soften as the collagen converts to gelatin during the braise. There is no reason to buy an expensive cut meant for quick steak searing. Well-marbled chuck from your local butcher works beautifully here.
Flemish stew is also made with pork in some homes. Pork cheeks and pork shoulder (pork butt or collar) are excellent braising alternatives, producing a lighter and slightly sweeter result than beef. A beef-and-pork blend is another popular option. This recipe stays focused on the deep, robust flavor of beef, though any pork version simply needs to be judged on its own cooking time and tenderness.
| Cut | What to expect | What to watch |
|---|---|---|
| Chuck roast or beef neck | The foundation of this recipe: flavorful cuts suited to a long braise. | Cut into even pieces and judge tenderness with a fork. |
| Boneless beef short ribs | A rich option for beef stew; marbling varies from piece to piece. | Ask your butcher for short ribs suitable for braising. |
| Pre-cut stew beef | A broad retail label that can include cuts with different amounts of fat and connective tissue. | Ask which cut it comes from. Very lean cubes may taste dry even when tender. |
| Beef cheeks | High in connective tissue, with a different texture from regular stew meat. | A good variation, but do not assume the same cooking time as the base recipe. |
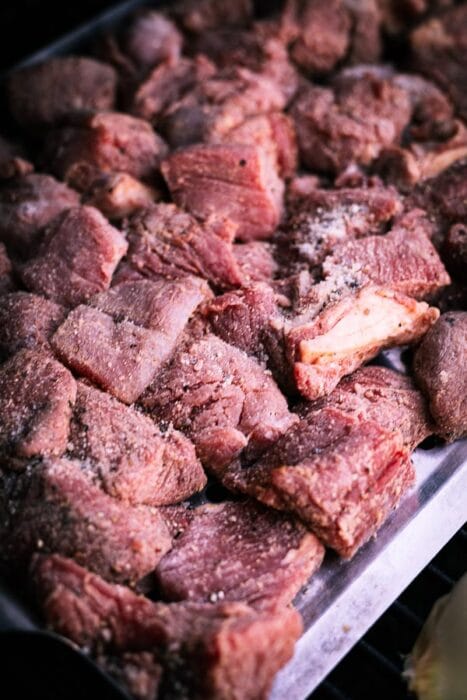
Cut the beef into generous chunks, large enough to rest safely on the grill grate. If you prefer smaller bite-sized pieces, use a cast-iron skillet or a perforated grill pan so the meat sears over the fire without falling through the bars.
Can you grill the beef as whole steaks first and cube it later? Absolutely. Just toss the meat in flour later when building the stew in the pot. Keep in mind that this is a tradeoff in surface area: grilling individual cubes creates far more browned crust, and that extra Maillard reaction gives your finished stew a much deeper, roasted flavor profile.
Beer and Flavorings for Flemish Beef Stew
What Beer Works Best in Belgian Beef Stew?
Choose a beer with real character, but steer clear of heavy hop bitterness, reducing an overly hoppy beer will leave your sauce harsh and metallic.
Belgian dark ales like St. Bernardus 12 and Rochefort 10 take the stew in a warm, comforting direction, reducing into a rich base with caramel and malt notes. A Flemish red-brown ale such as Rodenbach or Rodenbach Alexander brings bright, fruity acidity instead, a brightness that cuts cleanly through both the rich beef fat and the smoke from the grill.
Can’t find these specific Belgian beers in the US?
- For the sour/acidic style (Rodenbach profile): Look for imported Flemish Red Ales like Duchesse de Bourgogne or Monk’s Café Flemish Sour Ale. Avoid American hoppy sour ales or IPAs, as boiling them down will make the sauce harsh and bitterly metallic.
- For the dark/sweet style (Rochefort/St. Bernardus profile): Reach for widely available Belgian imports like Chimay Blue or Gulden Draak, or US-brewed Belgian-style ales like Ommegang Abbey Ale or Allagash Dubbel.
I went with Rodenbach for this session. But no matter what choice you make, always wait until the end before adjusting the sauce. A sour ale often benefits from a small spoonful of brown sugar or Belgian pear syrup, whereas a sweeter dark beer might need a touch of vinegar or mustard. Taste first, then adjust in small steps.
That choice matters beyond stew, too. A beer that works beautifully in a long braise can turn harsh when reduced into a glaze. In my guide to cooking with beer on the grill, I compare which styles work best for marinades, sauces, steaming, baking and slow-cooked dishes.
The base recipe uses 16.9 fl oz (500 ml) of beer for 4.4 lb (2 kg) of beef. Your total liquid needs will depend on the width of your Dutch oven and whether you cook covered or uncovered, a wide, open pot loses liquid quickly, so keep warm beef stock or extra beer nearby.
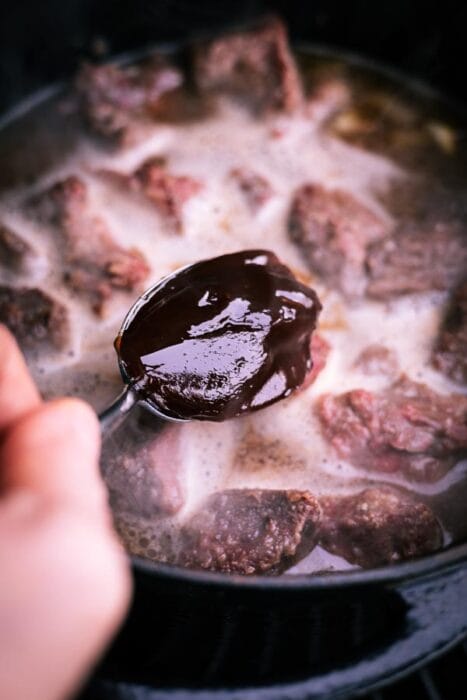
This is not a thin pancake syrup. It is a thick, dark, caramelized fruit reduction made from apples and pears. If you can’t source imported Belgian pear syrup (Luikse stroop of perenstroop), Apple Butter is your closest US supermarket alternative—it brings a similar rich fruit flavor, though it is slightly less dense and caramel-heavy.

Why Put Mustard-Spread Bread on the Stew?
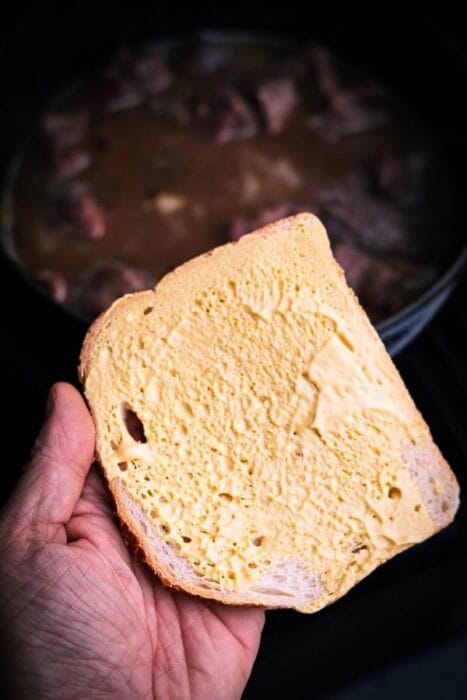
A slice of mustard-spread bread is the traditional secret ingredient to a rich, velvety stew: the starch works naturally to bind the sauce, while sharp mustard delivers essential acidity and bite to balance the beef fat. Choosing Belgian-style spiced gingerbread instead of plain white bread introduces a much warmer, aromatic layer of spice. However, if you opt for gingerbread, be conservative with the optional pear syrup to keep the pan from becoming overly sweet. Even swapping sharp mustard for a mild honey mustard completely shifts the balance. Always taste and correct the sauce as you go, rather than stacking sweet ingredients automatically.
We mean a soft, spiced rye bread, not a hard gingerbread cookie. You can order the traditional imported version directly, or simply stick to a sturdy slice of white or sourdough bread spread with sharp mustard and add a small teaspoon of dark brown sugar or molasses straight to the pot.
Buy Traditional peperkoek on AmazonOnions, Thyme, Bay and Belgian Stew Seasoning
The supporting flavors matter just as much as the beef and beer. Slowly caramelized onions lay down a deeply sweet and savory foundation. Traditional Belgian stew seasoning blends build on this with warm notes of black pepper, paprika, clove, nutmeg, thyme, bay leaf, and a subtle touch of cinnamon to give the braise its rich, comforting depth. Fresh thyme and bay leaves round out the sauce as it simmers. Just keep an eye on your spices: because commercial blends vary wildly, always check their salt content before hitting the meat with extra SPG.
What You Need for Dutch Oven Beef Stew on the Grill
Before lighting the fire, make sure you have the right setup ready. Cooking a stew over live wood fire or charcoal grill requires reliable heat retention and gear that can handle high temperatures without flinching. Here is the essential hardware for the job:
- Cast-Iron Dutch Oven: Choose a heavy-bottomed pot large enough to hold the beef, onions, and liquid with plenty of room left to stir. Ensure the pot, lid, and handles are fully rated for high heat and fit comfortably under your grill’s dome.
- Long tongs, sturdy spoon, and heat-resistant gloves: Crucial for searing the meat over open heat, stirring the braise, and moving piping-hot cast iron safely.
- Pellets or quality charcoal: Hardwood pellets deliver clean smoke on a pellet smoker. If using charcoal, additional wood chunks are optional, the long simmer already absorbs plenty of smoky character from the grill environment.
Kamado or Pellet Grill Setup for Dutch Oven Stew
Temperature control makes or breaks a stew on the grill. The goal is simple: sear the beef hard enough to build a deep, roasted crust, then let it simmer low and slow for hours until the meat yields to the touch of a fork.
Do not rely on your dome thermometer alone. Heat transfers into cast iron differently depending on your cooker. A heavy pot loaded with cold beef, onions, and beer reacts very differently over direct charcoal than it does sitting above a heat deflector or inside a pellet grill.
Cast iron requires enough thermal energy around its base and walls to bring that mass of liquid to a steady simmer. A full heat deflector blocks direct radiant heat from below, meaning your air-temperature gauge might look high while the stew inside barely moves. If you are cooking indirectly, you may need to set your grill temperature higher than expected. Don’t just watch the gauge, watch the sauce. A quiet, steady bubble is your target.
Need a refresher on managing your fire? Read my guide to direct and indirect grilling before choosing your setup.
| COOKING STAGE & SETUP | GRILL TARGET | WHAT TO MONITOR |
|---|---|---|
|
Stage 1: Sear Beef & Onions (Direct Heat) | ~390°F (200°C) | Sear decisively to build a deep crust without burning the flour or spices. Use a cast-iron skillet or perforated grill pan for smaller cubes. |
|
Stage 2A: Braise via Direct Heat (Kettle / Kamado without deflector) | ~285°F (140°C) | The pot receives strong direct heat from below. Scrape the bottom regularly to prevent scorching, and choke back the vents if the sauce boils too hard. |
|
Stage 2B: Braise via Indirect Heat (Pellet grill / Kamado with deflector) | ~390°F (200°C) | Ambient heat does the heavy lifting. Monitor evaporation—especially if cooking uncovered—and adjust airflow until you hit a gentle, steady simmer. |
The settings above describe the options used for this recipe. Combining a heat deflector with a much lower grill temperature may mean the stew takes longer to reach a simmer. That does not make a lower setting wrong. Watch what is actually happening inside the Dutch oven and adjust from there.
How to Make Belgian Beef Stew on the Grill
At first glance, making beef stew outdoors isn’t all that different from cooking it in the kitchen. You could just brown the meat in a Dutch oven, pop the lid on, and let it bubble away over the grate. That works, but it leaves the grill’s greatest assets unused: live fire and subtle smoke.
A few deliberate tweaks give this Flemish classic a restrained, smoky signature. I shot and cooked this batch on my Traeger Ironwood 885, but with the right heat management, the exact same technique translates seamlessly to a kamado or kettle grill like a classic Weber.
1. Build a Grilled Crust on the Beef and Onions
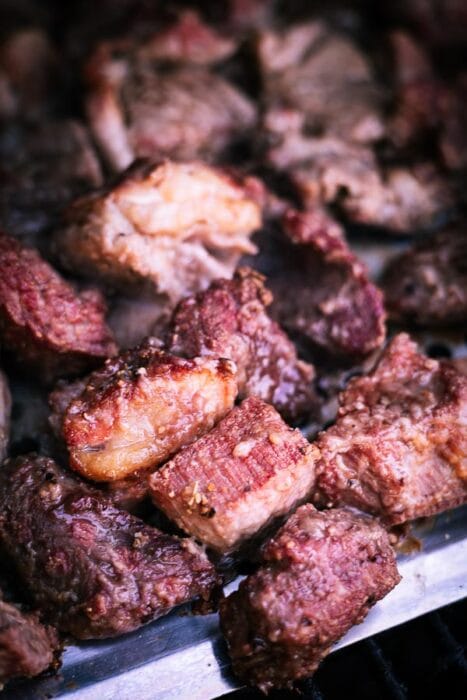
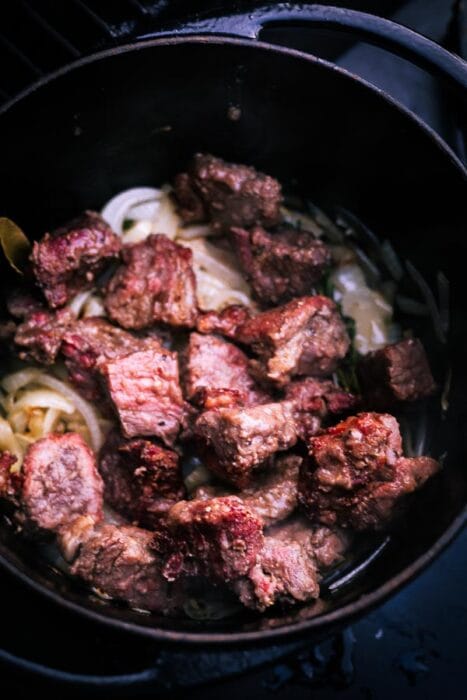
Instead of dropping the beef straight into the pot, coat the cubes lightly with flour, Belgian stew seasoning and SPG (salt, pepper and garlic). Shake off loose flour and sear the beef directly over the coals or flame.
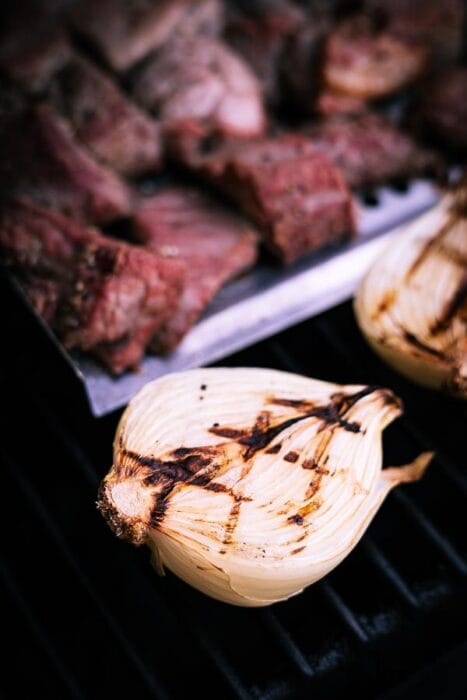
Control matters here. You want a deeply browned crust, not black, burned flour. Cut the onions in half and grill their cut sides before cooling them briefly and slicing them into half-moons.
Direct grilling means you sacrifice some of the fond that usually builds on the bottom of the pot. In return, you sear a rich crust over every surface of the beef while infusing a subtle layer of woodsmoke. That is the flavor tradeoff at the heart of this BBQ version.
Prefer the traditional route? You can still brown the beef inside the Dutch oven. Just work in small batches so the meat sears instead of steaming, then deglaze the pot to release those flavorful bits. Both methods work, but direct grilling gives this BBQ version its true identity.

2. Build the Beer Sauce in the Dutch Oven
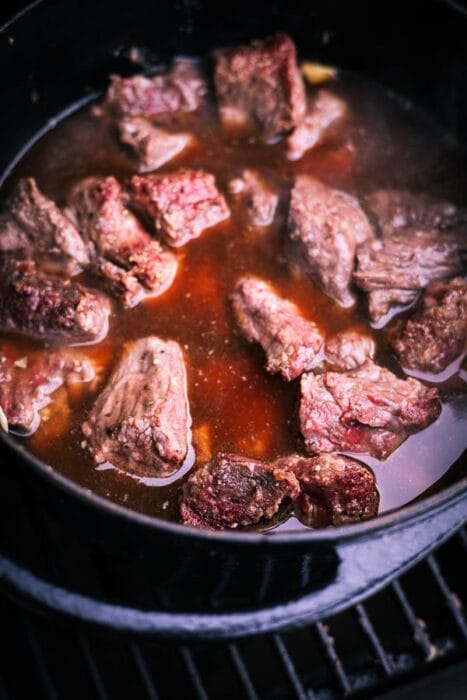
Melt a generous knob of butter in the pot and let the grilled onions caramelize a bit further alongside fresh thyme and bay leaves. Return the beef to the pot. Gently warm your beer, as detailed in the recipe card below, and pour it over the meat. Tuck the mustard-spread bread on top, mustard side down, and add a spoon of Belgian pear syrup if using (see US Ingredient Guides above for apple butter and ontbijtkoek alternatives). Bring the pot to a gentle simmer, then dial back your heat to keep the bubbles calm and steady.
3. Braise Until Tender and Manage the Sauce
Plan on roughly 3 to 4 hours, but let the meat render on its own terms. Test several chunks with a fork: it should slide in effortlessly and the beef should yield without fight. Stir the bottom regularly and keep a close eye on your liquid levels. If the sauce thickens before the meat is fully tender, splash in a little warm water or unsalted beef broth and cover the pot. Adding more beer is an option, but keep in mind it will shift the sweet-bitter balance of your braise to the more bitter end.
Dutch Oven Beef Stew: Lid On or Off?
When your Dutch oven is on the grate, one rule is absolute: keep the grill lid down. Every time you lift it, you dump heat and disrupt the convection currents sweeping around the pot.
The Dutch oven lid, however, is your control dial. Leaving it off lets the woodsmoke kiss the sauce while the liquid slowly reduces into a glossy gravy. Popping it on traps moisture and shields the braise if the fire starts running hot. Master that balance, and you master the stew.
| Decision | Dutch oven lid ON | Dutch oven lid OFF |
|---|---|---|
| Choose it when… | • You need to retain liquid • The smoke level is already right • You are using assertive charcoal smoke | • You want a light smoky note • The sauce needs to reduce • You are cooking on a pellet grill with mild, clean smoke |
| Effect on the sauce | Evaporation slows and the liquid level stays steadier. | The sauce takes on smoke and concentrates faster as water evaporates. |
| Watch out for… | The sauce may remain thin. Uncover near the end if the tender beef still needs a tighter sauce. | The pot can dry out. Check regularly and add warm water or unsalted broth before the sauce catches. |
Smoke Is a Seasoning: Keep It Subtle
For this batch, I ran the Dutch oven completely uncovered on my Traeger pellet grill. The clean, gentle smoke of a pellet cooker is a natural fit for a rich braise like this, but you don’t have to leave the pot wide open for the full four hours.
Keep in mind that woodsmoke concentrates as the liquid reduces, and it often tastes noticeably bolder the next day after resting in the fridge. Taste the sauce as it simmers. The moment it hits that sweet spot of subtle smoke, pop the cast-iron lid on the pot to protect the balance of beer, beef, and aromatics.”
In the tight, highly insulated dome of a kamado, heavy smoke gets trapped quickly. A reader once ended up with an overpoweringly smoky stew by leaving the pot open over charcoal! To avoid this, stick to clean-burning, fully lit lump charcoal with zero white smoke. Skip extra wood chunks entirely, and cap the Dutch oven with its lid the moment the sauce hits the right level of smoke depth.
Check the Recommended Cast-Iron Dutch Oven on AmazonTroubleshooting Beef Stew on the Grill
| Problem | Likely Cause | What to Do |
|---|---|---|
| The beef stays tough | It needs more time, or the pot isn’t hot enough to simmer. | Confirm you have a steady, gentle bubble going. Add a splash of warm liquid if it looks dry and let time do the work. A cold pot will never break down collagen. |
| The beef tastes dry or stringy | The cut was too lean, or the stew boiled too hard for too long. | Next time, pick a well-marbled, collagen-rich cut like chuck or beef neck. For this batch, pull the meat into smaller strands and serve with plenty of sauce. |
| The sauce is too thin | Too much liquid trapped in the pot or insufficient starch binding. | If the meat is tender, scoop it out temporarily so it doesn’t overcook. Simmer the sauce uncovered until it reduces into a glossy gravy. |
| The sauce is too thick or scorching | Excessive direct heat from below or too much evaporation. | Pour in warm water or beef broth, lower your heat, and cover the pot. Critical: do not scrape the bottom if it caught, or you will ruin the sauce with acrid burnt bits. |
| The stew is too smoky | The pot spent too long uncovered over heavy or dirty woodsmoke. | Cap the Dutch oven much earlier next time. Sugar or cream won’t erase heavy smoke; lesson learned for the next fire session. |
| The sauce is too bitter or sweet | Over-hopped beer, scorched flour, or an overdose of gingerbread or syrup. | Taste before adding extra sweet elements. Balance excess sweetness with a dash of red wine vinegar; mask mild bitterness with a touch of brown sugar. Burned flour cannot be saved. |
Serving, Making Ahead and Storing Belgian Beef Stew
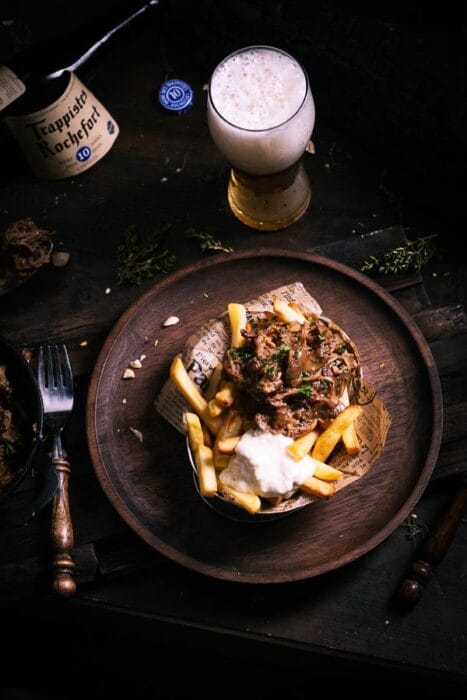
A steaming bowl of Flemish beef stew demands the classics: crisp, golden fries and a generous dollop of rich mayonnaise. A thick slice of crusty bread is mandatory too, if only to wipe up that final, velvety streak of beer sauce left on the plate.
You can serve the stew immediately once the meat melts at the touch of a fork and the sauce tastes balanced. But patience pays a serious dividend. Like most great braises, this stew tastes even better after a night in the fridge. As it rests, the subtle bitterness of the beer, the warm spices, and that subtle kiss of woodsmoke fuse into a far richer, more unified whole.
Cooking a day ahead? Keep the smoke restrained during the braise and put the lid on the Dutch oven a bit earlier. Smoke intensifies overnight, and it should support the beer and beef, never overpower them.
Never leave a heavy Dutch oven cooling on the counter for hours. A large mass of hot liquid sits right in the food danger zone. Divide the stew into shallow containers and get it into the fridge within 2 hours (or within 1 hour if ambient heat tops 90°F / 32°C). Store at 40°F (4°C) or below, enjoy within 3–4 days, and always reheat portions thoroughly to an internal 165°F (74°C). Check the official USDA guidance for cooked beef for full handling rules.
More Outdoor Cooking Guides
This stew combines several techniques that show up throughout my BBQ cooking. The direct versus indirect grilling guide helps you manage the switch from searing to braising. For a broader look at patient fire control, continue with my low and slow BBQ guide. Cooking over charcoal? My guide to the best charcoal briquettes explains how different fuel shapes and burn patterns affect a long cook.
Did you go for a fruity Flemish Red or a heavy Belgian Dubbel? Drop a comment below and tell me how you balanced the smoke with the sauce on your setup!
Fired up this recipe? A quick 5-star rating takes two seconds and helps fellow pitmasters find the real Belgian deal.
Recipe: Belgian Beef Stew on the Grill
Belgian Beef Stew on the Grill
Equipment
- Grill with a lid (Pellet grill, Kamado, or Kettle)
- Cast-iron Dutch oven (8-quart recommended)
- Sturdy wooden spoon
- Perforated grill pan (optional)
- Heat deflector (for indirect setups)
Ingredients
For the Belgian beef stew
- 4.4 lb Beef chuck roast or beef neck trimmed and cut into generous, 1.5-inch cubes
- 2 tbsp All-purpose flour
- 2 tbsp Belgian stew seasoning or a savory beef rub; mind the salt content
- SPG rub salt, coarse black pepper, and garlic powder to taste
- 2 Large yellow onions halved for initial grilling, then sliced into half-moons
- 2 tbsp Unsalted butter for sautéing the grilled onions
- 2 1/8 cups Characterful Belgian beer Belgian Flemish Red Ale (e.g., Rodenbach), Belgian Dubbel, or Dark Ale with low hop bitterness
- 4 sprigs Fresh thyme leaves stripped
- 2 Bay leaves
- 2 slices White bread or Dutch Dutch peperkoek / spiced gingerbread for a sweeter, warmer sauce profile
- 2 tbsp Yellow or Dijon mustard generously spread over the bread
- 3 tbsp Belgian pear syrup or US Apple Butter; add to taste depending on beer sweetness
- 1 splash Red wine vinegar or white vinegar to balance sweetness at the end
If needed during the braise
- Warm water or unsalted beef broth add in small splashes if the sauce thickens before beef is tender
Instructions
Prepare and grill
- Season the beef: Cut the beef chuck into generous, even cubes. Combine the flour, stew seasoning, and SPG rub, then coat the meat evenly. Shake off any excess flour. Mind the salt level if your rub already contains salt.
- Fire up the grill: Set your grill or kamado to approximately 390°F (200°C) for direct heat grilling. Peel and halve the yellow onions.
- Sear the beef and onions: Sear the beef cubes and onion halves directly over the fire until a deep, caramelized crust forms. Work in quick batches to avoid burning the flour or spices. Use a perforated grill pan if your beef cubes are small. The beef does not need to be cooked through. Let the onions cool briefly, then slice them into half-moons.
Build the beer sauce
- Sauté the aromatics: Melt the butter in your cast-iron Dutch oven. Sauté the grilled onions with the fresh thyme leaves and bay leaves for 2 minutes, then add the seared beef.
- Warm and add the beer: Gently heat the Belgian beer in a small saucepan for about 5 minutes until warm (just below a boil). Pour the warm beer directly over the beef in the pot.
- Add mustard bread and syrup: Spread mustard thickly onto the bread slices and lay them mustard-side down on top of the stew. Add pear syrup (or apple butter) to taste. The bread completely breaks down during the long simmer, thickening the sauce. If using spiced gingerbread (ontbijtkoek), start with less syrup as it adds natural sweetness.
Braise on the grill
- Set your cooking zone: For direct braising on a kettle or kamado, lower the fire to around 285°F (140°C). For indirect braising (with a heat deflector or on a pellet smoker), maintain ambient heat around 390°F (200°C). Ensure the liquid inside the Dutch oven stays at a calm, steady simmer rather than a hard boil.
- Manage lids and smoke: Keep the grill dome closed. Leave the Dutch oven uncovered initially to absorb a subtle kiss of woodsmoke. Stir the bottom regularly to prevent sticking. Once the sauce carries the right level of smoke or begins reducing too fast, cap the Dutch oven with its lid to lock in moisture.
- Braise until tender: Braise for roughly 3 to 4 hours. Test multiple beef cubes with a fork: the meat is ready when it yields effortlessly without resistance. If still firm, cover and continue simmering. Splash in warm water or beef broth if the liquid reduces too far.
- Adjust sauce consistency: If the beef is fork-tender but the sauce is thin, remove the pot lid and reduce uncovered. Stir frequently. For extra body, mix a cornstarch or flour slurry with cold water, stir it gradually into the bubbling sauce, and simmer for 3 minutes. Balance flavor with a splash of vinegar or extra syrup if needed.
Serve or make ahead
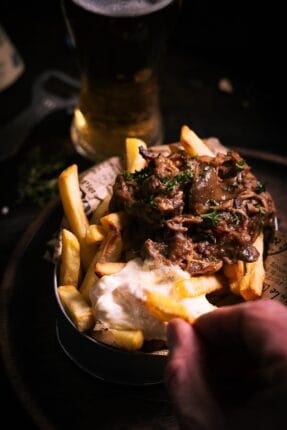
- Serve: Plate hot with golden, crisp fries (or double-fried Belgian frites), a generous dollop of mayonnaise, and crusty bread.
- Safe overnight storage: To make ahead, divide hot stew into shallow, covered containers and refrigerate within 2 hours (or within 1 hour if ambient temp exceeds 90°F / 32°C). Chill at 40°F (4°C) or below. Reheat thoroughly to an internal temperature of 165°F (74°C), adding a splash of water to loosen the gravy.
Notes
Frequently Asked Questions
Can I make Belgian beef stew on a kamado or pellet grill?
Absolutely. High-heat sear the beef cubes and onion halves directly over the coals first, then set up your grill for indirect cooking to keep the Dutch oven at a gentle, steady simmer. A heat deflector ensures the bottom of your pot doesn’t scorch the gravy.
Should the lid stay on the Dutch oven while the stew cooks?
Start with the Dutch oven lid off and the grill dome closed. This lets the sauce absorb a subtle kiss of woodsmoke and begin reducing. Once you hit the right smoke level or if the liquid reduces too quickly, cap the Dutch oven with its lid to lock in moisture.
What cut of beef is best for Flemish beef stew?
Beef chuck roast and beef neck are the absolute top choices for classic rich flavor. Boneless short ribs or beef cheeks also work brilliantly, though cooking times will vary. Always choose a collagen-rich braising cut and let fork-tenderness decide when it’s done.
How long does Dutch oven beef stew take on the grill?
Plan on 3 to 4 hours of braising time. Chunk size, beef cut, and ambient grill temperatures all play a role. Test several pieces with a fork—the meat is ready when it offers zero resistance.
Do I need to add extra smoking wood chunks?
No. Searing the meat directly over charcoal already injects plenty of grill character, and the open Dutch oven picks up clean smoke during the simmer. Heavy smoke wood can overpower the beer sauce, so stick to charcoal heat.
Does Belgian beef stew taste better the next day?
Yes! While delicious straight out of the pot, an overnight rest in the refrigerator allows the flavors of the Belgian beer, mustard, and spices to meld deeply into the meat. Cool quickly in shallow containers before chilling.


