
Low and slow BBQ is about cooking with controlled heat, time and, in most cases, smoke. It is the technique behind pulled pork, smoked ribs, brisket and many other barbecue classics. But it is not simply a matter of setting your smoker to 225°F, adding a large piece of meat and waiting until it falls apart. Good low and slow barbecue starts with understanding your fire.
Introduction:
For great low and slow BBQ you need to know where the heat comes from, how it moves through your cooker and how much smoke your food actually needs. Just as importantly, you need to recognize when a piece of meat is ready instead of blindly following a cooking time or one exact internal temperature.
I have cooked on kettle grills, kamados, pellet grills, gas grills and different live-fire setups for more than 15 years. If that experience has taught me anything, it is that every cooker behaves a little differently. Even two BBQs of the same type can react differently depending on the weather, the fuel and how much food you put inside.
That is why this guide will not promise perfect results based on one supposedly magical temperature. Instead, it will help you understand the ranges, decisions and techniques behind low and slow BBQ. Once you understand those, you can adapt them to almost any grill or smoker.


Low and slow BBQ in a nutshell
Low and slow BBQ usually means cooking food indirectly at approximately 225–275°F / 100–140°C for an extended period. Temperatures up to about 284°F / 140°C can still be used for many low and slow preparations, but beyond that point the cook starts moving toward roasting or hot-and-fast barbecue.
These numbers are working ranges, not targets that must be controlled to the exact degree. A smoker moving between 240°F and 260°F / 110°C and 130°C is not failing. It is simply burning a live fuel. The goal is a reasonably stable cooking environment, clean smoke and enough time for the food to develop the desired texture.
Time is always an estimate. Internal temperature tells you how far the cooking process has progressed, but texture ultimately tells you when many low and slow cuts are done.
Low and slow BBQ at a glance
| Element | Practical guideline | What matters most |
|---|---|---|
| Cooking temperature | Usually 225–275°F / 107–135°C | A stable range, not one exact number |
| Heat | Mostly indirect | Protecting the food from strong radiant heat |
| Smoke | Clean and controlled | Quality matters more than quantity |
| Cooking time | Several hours for larger cuts | Cook for tenderness, not strictly by the clock |
| Doneness | Internal temperature plus a physical test | Probe tenderness, flexibility and final texture |
What is low and slow BBQ?
Low and slow BBQ is a method in which food cooks gradually in a relatively low-temperature environment, usually away from direct flames or glowing coals. Smoke from wood, charcoal or pellets is often part of the process, although not every slow indirect cook needs a pronounced smoke flavor.
The method is particularly useful for large, tough cuts that contain connective tissue and fat. Pork shoulder, beef brisket, chuck roast and ribs need more than a safe internal temperature. They need time for their structure to soften and become tender.
That does not mean every product benefits from a twelve-hour cook. A salmon fillet can be hot-smoked at a much lower chamber temperature and finish in a fraction of the time. Chicken can be smoked slowly, but its skin often benefits from a hotter cooking environment. A thick steak may start with a gentle indirect cook, yet the final goal is still medium-rare meat with a seared crust rather than the breakdown of connective tissue.
Understanding those differences prevents low and slow from becoming a one-size-fits-all trick.

Low and slow BBQ vs. grilling
Grilling generally uses strong direct or radiant heat to cook and brown food quickly. Burgers, thin steaks, sausages, vegetables and seafood are often cooked this way. The surface browns rapidly while the inside reaches the desired doneness.
Low and slow BBQ uses a gentler cooking environment. The food is usually placed away from the main heat source, with the lid closed so that hot air and smoke can circulate around it. Longer cooking time allows larger cuts to heat more evenly and gives connective tissue time to soften.
The boundary is not absolute. Many of the best BBQ preparations combine techniques. You might smoke a pork shoulder slowly and finish parts of it in a hot skillet. You can cook a thick steak gently before searing it over direct heat. Chicken may start indirectly and finish closer to the fire to improve the skin.
The important question is not whether a technique fits neatly into one category. An important question is what you want the heat to do at each stage of the cook.
Is low and slow the same as smoking?
The two techniques overlap, but they are not identical. Smoking refers to exposing food to smoke as part of the preparation. Low and slow refers primarily to the relationship between heat and time. Most classic American barbecue combines both, but there are exceptions.
You can cook a pork shoulder indirectly with charcoal and hardly any added smoke wood. That is still low and slow cooking, although the smoke flavor will be subtle. You can also hot-smoke salmon at around 165–195°F / 74–91°C. That is clearly smoking, even if the cook does not last all day.
Cold smoking is a different process altogether. The temperatures are too low to cook the food, which means curing, food safety and environmental temperature become much more important. Cold smoking deserves its own guide and should not be treated as a colder version of ordinary low and slow BBQ.

[INTERNAL LINK: Cold smoking guide — future supporting article]
What temperature counts as low and slow?
For most meat, a useful starting range is 225–275°F / 107–135°C.
That range is wide enough to show an important truth: low and slow BBQ does not depend on maintaining 225°F / 107°C to the exact degree. Plenty of excellent barbecue is cooked at 250°F / 121°C or 275°F / 135°C. Some cooks deliberately raise the temperature after wrapping because the food no longer benefits much from additional smoke and the package protects the surface.
Different products also need different approaches:
- Pork shoulder, ribs and brisket are commonly cooked between 225 and 275°F / 107 and 135°C.
- Hot-smoked salmon can be cooked around 165–195°F / 74–91°C for a soft, evenly cooked texture.
- Poultry can be smoked slowly, but cooking closer to 300–350°F / 149–177°C generally produces better skin.
- A pork loin or thick steak may be cooked gently at first, but should not be treated like pork shoulder because it does not contain the same amount of connective tissue.
- Live-fire preparations may not have one measurable chamber temperature at all. Distance from the fire, the size of the coal bed and the position of the food become the main controls.
These are guidelines, not laws. Your thermometer can help you read the cooking environment, but it should not turn barbecue into a stressful attempt to keep the display fixed on one number.
Why staying below about 284°F / 140°C matters
The 284°F / 140°C limit is a practical boundary, not a magic scientific switch. Your brisket does not suddenly stop being low and slow when the smoker briefly reaches 286°F / 141°C.
It is still a useful boundary because the balance of the cook begins to change as the chamber temperature rises.
Below approximately 284°F / 140°C, large cuts cook slowly enough to spend considerable time in contact with smoke while their internal temperature rises gradually. Moisture evaporating from the surface also cools the food, which helps keep the surface temperature lower than the surrounding air during much of the cook.
As the pit temperature moves further above 284°F / 140°C:
- heat moves into the outer layers faster;
- moisture is lost more rapidly;
- rubs containing sugar are more likely to darken or burn, especially near strong radiant heat;
- the outside may become firm before the connective tissue inside has had enough time to soften;
- smoke exposure becomes shorter because the total cooking time decreases;
- differences between hot spots and cooler areas become less forgiving.
That does not make higher temperatures wrong. Hot-and-fast brisket and pork shoulder can be excellent. It simply becomes a different balance between speed, smoke, bark and moisture.
The actual surface of the food is also influenced by evaporation, airflow and radiant heat. A smoker set to 275°F / 135°C does not mean every part of the meat is sitting at exactly that temperature. A sugary rub facing a glowing fire can scorch even when the air temperature appears moderate.
For the purpose of this guide, I use 284°F / 140°C as the upper edge of traditional low and slow cooking. Short fluctuations above it are not a problem. Running a complete cook well above it is better described as hot-and-fast barbecue or smoke-roasting.


When is low and slow the right technique?
Low and slow works best when the food needs time, smoke or gentle heat to develop the desired result.
Good candidates include:
- pork shoulder and Boston butt;
- beef brisket;
- beef chuck;
- pork and beef ribs;
- lamb shoulder;
- larger poultry preparations when soft skin is acceptable or a hotter finishing stage is planned;
- hot-smoked salmon and other fatty fish;
- sausages and meatloaf-style preparations;
- some vegetables, beans and smoked side dishes.
Cuts rich in connective tissue are particularly suitable. They may be tough when cooked only to the minimum safe temperature, but become tender when held at higher internal temperatures long enough for collagen to convert into gelatin.
When is low and slow not the best choice?
Low and slow is not automatically the most “serious” way to cook on a BBQ. Sometimes it is simply not the best technique.
Thin steaks, burgers, shrimp, delicate white fish and many vegetables benefit from faster cooking. Lean cuts such as pork tenderloin can dry out when treated like pork shoulder. Chicken cooked at a very low pit temperature may taste smoky and remain juicy, but the skin will often stay soft or rubbery.
That does not mean chicken and turkey cannot be cooked low and slow. It means you need to choose your priority.
If you want a strong smoke flavor and very gradual cooking, you can start at a lower temperature. If crisp skin matters more, cook hotter from the beginning or finish the bird at a higher temperature. Neither approach is universally correct.
We will return to that choice in the poultry and temperature sections.
When should you cook low and slow?
| Low and slow works well when | Another technique may be better when |
|---|---|
| The cut contains a large amount of connective tissue. | The food is thin, lean or naturally tender. |
| The food needs several hours to become tender. | The center will finish before the surface can brown properly. |
| You want to build layers of clean smoke and bark. | A strong smoke flavor would overpower the food. |
| You are cooking pork shoulder, brisket, chuck, ribs or lamb shoulder. | You are cooking thin steaks, burgers, shrimp or delicate white fish. |
| Soft poultry skin is acceptable or you plan to finish at a higher temperature. | Crisp chicken or turkey skin is the main priority. |
| Distance and placement can protect the food from direct heat during an open-fire cook. | The food benefits from fast browning over direct heat. |

Why low and slow BBQ works
Low and slow cooking is often explained with vague phrases about “letting the smoke work its magic.” Smoke certainly matters, but there is no magic involved. The result comes from the interaction of heat, time, moisture, fat, connective tissue and surface reactions.
Understanding those processes makes it easier to adapt when a cook runs faster or slower than expected.
Heat, time and connective tissue
Muscles that work hard during the animal’s life generally contain more connective tissue. That is why shoulder, brisket and chuck can be tougher than tenderloin or rib-eye.
Collagen is one of the main structural proteins in that connective tissue. During a long cook, heat and moisture gradually help transform collagen into gelatin. The process is not linked to one exact internal temperature. It develops over a range and depends on both temperature and time.
This explains why two pork shoulders can reach the same internal temperature but feel completely different when probed. One may be soft and ready to pull. The other may still feel tight because it needs more time.
It also explains why the minimum safe temperature is not automatically the ideal serving temperature. A pork shoulder may be microbiologically safe long before it is tender enough to pull apart.
Fat rendering and moisture
It is tempting to say that low and slow cooking “keeps all the juices inside.” That is not quite how it works.
Meat loses moisture as it cooks. Muscle fibers contract and push out water, while moisture also evaporates from the surface. Low and slow cooking does not stop that process. It gives you more control over how quickly it happens and allows collagen to create gelatin, which contributes to the moist, rich texture associated with good barbecue.
Rendered fat adds flavor and lubrication, but it does not replace water inside the muscle. A very fatty cut can still be overcooked or dry.
Juiciness depends on several factors:
- the cut and its fat distribution;
- the amount of connective tissue;
- cooking temperature;
- final internal temperature;
- time spent at that temperature;
- evaporation;
- whether the meat was wrapped;
- resting and holding;
- how the meat is sliced or pulled.
That is why “cook it longer” can solve a tough pork shoulder but ruin a lean pork loin.


How smoke builds flavor
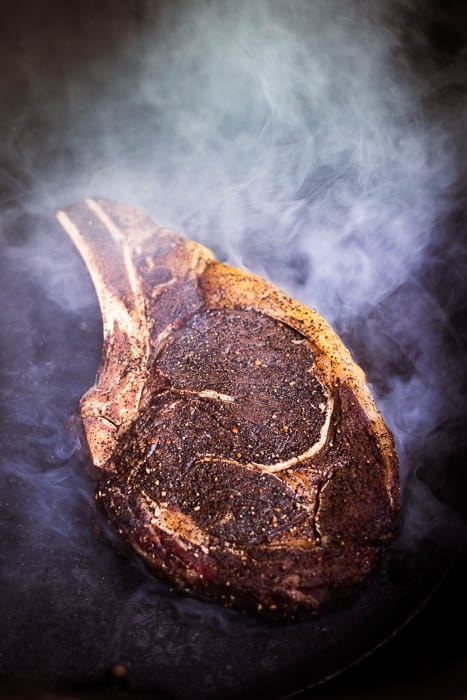
Smoke contains gases, vapors and tiny particles created as wood burns. Some of those compounds settle on the food and contribute aroma, flavor and color.
A cool, slightly moist surface collects smoke more readily than a hot, dry surface. This is one reason why smoke has a strong influence during the earlier part of a cook. As the surface warms and dries, smoke deposition changes.
This does not mean meat literally stops absorbing smoke at one exact internal temperature. There is no universal cutoff at 140°F, 150°F or any other popular number. The effect gradually changes as the surface becomes warmer, drier and more covered by bark.
Adding more wood for the entire cook can therefore produce a bitter result without adding the clean, layered smoke flavor you wanted.
How bark develops
Bark is the dark, flavorful crust that forms on the outside of smoked meat. It is built from seasoning, smoke, rendered fat, proteins and dried surface moisture.
A good bark needs time and airflow. If you wrap the meat very early, trapped steam softens the surface and limits further bark development. When you cook with dirty smoke, the bark may become bitter. Moreover, if the rub contains a lot of sugar and is exposed to strong radiant heat, it can burn before the inside is ready.
Spritzing can slow surface drying and help smoke adhere, but too much liquid repeatedly washes away seasoning and delays bark formation. A water pan may make the cooking environment more stable, but it does not automatically create juicy meat.
Bark is a result of balance, not one secret ingredient.
[INTERNAL LINK: How BBQ bark develops — future supporting article]

What you need for low and slow BBQ
You do not need a professional offset smoker or a collection of expensive gadgets. You need a cooker that can maintain indirect heat, suitable fuel and at least one thermometer you can trust.
A grill or smoker that can hold steady indirect heat
The food should not sit directly over a powerful flame or a concentrated bed of glowing coals for the entire cook. That would expose one side to much stronger radiant heat and could burn the outside before the center becomes tender.
Indirect heat can be created in different ways:
- placing the coals on one side of a kettle;
- using a heat deflector in a kamado;
- relying on the built-in diffuser of a pellet grill;
- separating the firebox and cooking chamber in an offset smoker;
- switching off one or more burners on a gas grill;
- moving food farther away from an open fire or placing it beside the coal bed.
The exact setup changes, but the goal remains the same: controlled heat reaching the food without continuous direct exposure to the fire.
Which thermometers do you actually need?
Different probes answer different questions. One thermometer does not necessarily replace all the others.
BBQ thermometers and probes explained
| Thermometer | What it measures | Best use | Main limitation |
|---|---|---|---|
| Pit or ambient probe | Air temperature close to the food | Monitoring the cooking zone during a long cook | Can misread when placed too close to cold meat, metal or direct heat |
| Leave-in meat probe | Internal temperature throughout the cook | Following cooking progress and recognizing the stall | Incorrect placement can produce misleading readings |
| Instant-read thermometer | Internal temperature at one specific point | Checking several areas and testing tenderness near the end | Does not continuously monitor the cook |
| Built-in lid thermometer | Air temperature near the lid or dome | Following general temperature trends | May differ significantly from the temperature at grate level |
| Wireless multi-sensor probe | Internal and estimated ambient temperature | Monitoring the cook remotely without cables | Its ambient sensor can sit too close to the cold meat early in the cook |
| Infrared thermometer | Surface temperature | Checking griddles, skillets and planchas | Cannot measure air temperature or internal doneness |
If I could choose only two, I would use a reliable ambient probe and a fast instant-read thermometer. The ambient probe tells me what the cooker is doing. The instant-read thermometer lets me check several parts of the meat and feel the resistance as the probe enters.
A leave-in meat probe is extremely convenient, especially for large cuts, but it should not be trusted blindly. If the tip sits in a pocket of fat, touches a bone or is inserted into a thinner part of the meat, the reading may not represent the coldest or most relevant area.
Use temperature to understand the progress of the cook. Use several measurements and a physical tenderness test to decide when the food is ready.


Fuel and smoking wood
The best fuel depends on your cooker.
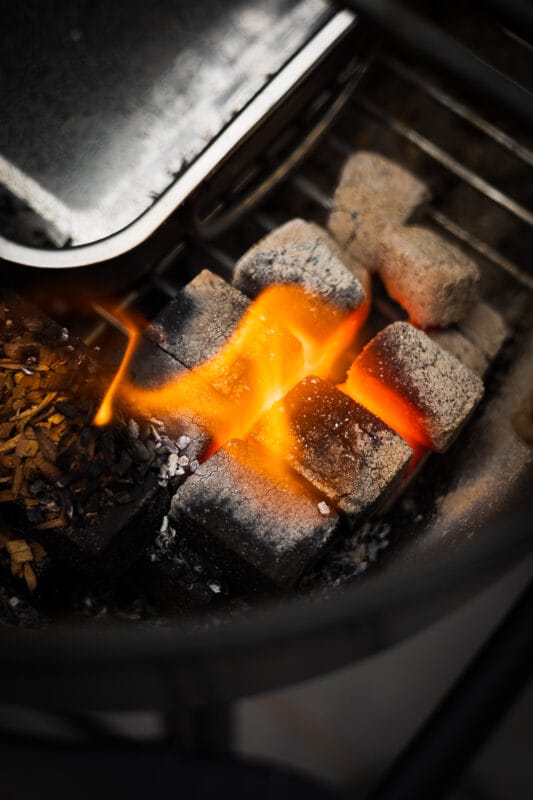
Charcoal briquettes burn consistently and are very useful for snake or fuse setups. Lump charcoal can burn cleanly and produce excellent heat, but the irregular pieces sometimes make a precisely arranged burn less predictable. Pellet grills use compressed hardwood pellets that are fed automatically into a burn pot. Offset smokers usually rely on a clean-burning wood fire or a combination of charcoal and wood.
For smoke flavor, wood chunks generally work better than small chips during longer charcoal cooks because they smolder or burn for longer. Pellets are designed for pellet grills and smoke tubes. Wood chips can be useful in gas grill smoke boxes, but often burn through quickly.
| Fuel or wood | Best use | What to know |
|---|---|---|
| Charcoal briquettes | Kettle grills and long snake or fuse setups | Burn consistently and are easy to arrange |
| Lump charcoal | Kamados and charcoal cookers | Burns cleanly and hot, but irregular pieces can make the fire less predictable |
| Wood chunks | Longer charcoal cooks | Burn longer than chips and provide gradual smoke |
| Wood chips | Gas grill smoke boxes and shorter cooks | Produce smoke quickly but burn through faster |
| Hardwood pellets | Pellet grills and smoke tubes | Provide controlled fuel and smoke in the correct equipment |
| Wood splits | Offset smokers and open-fire cooking | Need sufficient airflow to maintain a small, clean-burning fire |
Use dry, untreated cooking wood. Painted, glued, moldy or chemically treated wood does not belong anywhere near food.
Useful tools without buying unnecessary gear
A few basic tools make long cooks safer and easier:
- Fire management: charcoal chimney, long tongs and heat-resistant gloves
- Temperature control: a reliable ambient probe and a fast instant-read thermometer
- Cooking and wrapping: a drip pan, butcher paper or heavy-duty aluminum foil
- Preparation and serving: a sharp knife and a large, clean cutting board
- Resting and holding: an insulated box or another food-safe holding container
- Learning from every cook: a notebook or digital BBQ log
The log is more useful than many expensive accessories. Record the outside temperature, fuel, vent positions, pit temperature, wrapping point, final tenderness and resting time. After a few cooks, you will understand your own BBQ better than any generic chart can explain it.
If you are building a low and slow setup for someone else, or looking for a practical upgrade yourself, my BBQ gift guide includes useful thermometers, grilling tools, books and a few less obvious ideas for different budgets.


Low and slow BBQ setups for different smokers
Low and slow cooking is not limited to one type of smoker. The fire may be underneath, beside or in a separate chamber. Some cookers control airflow mechanically, while others rely on electronics. With open fire, you may not even have a lid or a single measurable chamber temperature.
The principle remains indirect, controlled heat. The way you create it changes.
Kettle grill
A kettle grill can produce excellent low and slow barbecue. Place the fuel on one side and the food on the other to create two zones. A drip pan underneath the food helps catch fat and can act as a physical buffer between the meat and the fire.
For shorter cooks, a compact charcoal basket may be sufficient. For longer cooks, the snake or fuse method arranges unlit briquettes around part of the edge of the kettle. A small number of lit briquettes gradually ignites the rest.
Wood chunks can be placed at selected points along the first section of the snake. There is usually no reason to distribute smoke wood along the entire fuel path.
Keep the exhaust vent above or near the food when possible. This encourages heat and smoke to travel across the cooking zone before leaving the kettle.
Kamado grill
A kamado is efficient because its thick ceramic body stores heat and limits fuel consumption. That is useful during a long cook, but it also means you should approach the target temperature slowly.
Once a kamado becomes too hot, cooling it down can take a long time. Start with a relatively small fire and reduce the airflow before the temperature reaches your target. Waiting until the dome thermometer reads 250°F / 121°C before closing the vents usually means the cooker will continue climbing.
Use a heat deflector between the charcoal and the food. Be aware that the temperature at the dome can differ from the temperature at the cooking grate, especially while the ceramic is still heating.
A kamado does not need to produce a continuous stream of visible smoke. A few well-positioned chunks mixed into the charcoal are generally enough.
Pellet grill
Most pellet grills are designed as indirect cookers. A heat diffuser or drip tray separates the burn pot from the food, while a controller feeds pellets into the fire and regulates airflow. That makes a pellet grill particularly easy to use for low and slow cooking. You set a target temperature, allow the cooker to preheat and monitor the food. It is one of the reasons I enjoy using pellet grills when I want consistent results or need to focus on the rest of a meal.
For a closer look at how these cookers feed fuel, regulate temperature and handle both smoking and higher-heat cooking, see my complete pellet grill guide.
The smoke flavor is often cleaner and more subtle than the flavor produced by an offset or a charcoal cooker with wood chunks. Lower settings generally create more smoke because the pellets burn in longer cycles, while higher settings create a hotter and more efficient fire.
Often indirect design
Many traditional pellet grills are indirect by design, but a growing number of newer models include a direct-grilling option. This may be a sliding diffuser, an opening above the burn pot or a separate high-heat zone. That direct option is useful for searing burgers, steaks or the final stage of a reverse sear. It does not change the basic low and slow setup: during the smoking phase, the diffuser remains closed and the food stays protected from direct flame.
Check the manual before using the direct-flame function. Grease accumulated during a long low-temperature cook can ignite when suddenly exposed to high heat.
To learn more about maximizing your cooker’s potential during long, low-temperature sessions, check out our comprehensive pellet grill guide for essential techniques, temperature tips, and mastering that perfect smoke flavor.


Offset smoker
An offset smoker separates the fire from the food. The fire burns in a side firebox, and hot air and smoke travel through the cooking chamber before leaving through the chimney. The main skill is not setting a controller but maintaining a small, clean fire. A large smoldering pile of wood produces heavy smoke and unstable heat. A smaller fire with good airflow generally burns cleaner.
Do not control an offset by choking the exhaust completely. The fire needs airflow to burn cleanly. Temperature is managed through fire size, fuel additions and the intake. Because heat enters from one side, an offset often has clear temperature zones. Learn where the hotter and cooler areas are before filling the entire cooking chamber.
Gas grill
A gas grill can be used for indirect cooking by leaving one or more burners off and placing the food above the unlit section. The lit burner or burners provide heat, while a smoke box or foil packet with wood chips can add smoke.
This setup will not behave exactly like a charcoal or wood-burning smoker. Smoke production is usually shorter and the burners may cycle differently in wind or cold weather. But it is still a practical way to learn indirect cooking and produce good food with the equipment you already own.
Keep the smoke wood away from dripping grease and make sure the grill has adequate ventilation. Never block factory ventilation openings in an attempt to trap more smoke.
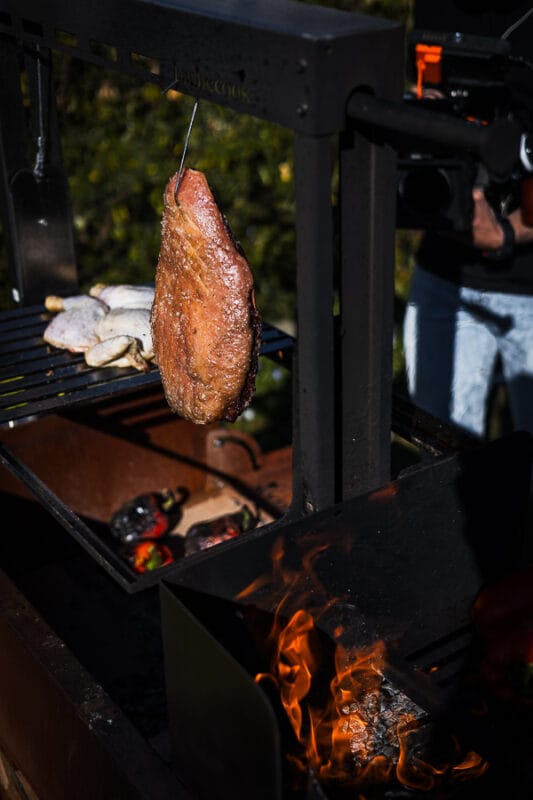
Low and slow over an open fire
Open-fire cooking deserves a place in a low and slow guide because low-temperature cooking does not always happen inside a closed smoker.
When food hangs beside a fire, sits on a raised grill grate or cooks on a plank facing the flames, the main controls are:
- distance from the fire;
- height above the coal bed;
- position relative to the flames;
- size and depth of the coal bed;
- amount of radiant heat;
- wind direction;
- how often the food is turned or repositioned.
Moving food a few inches or several centimeters can have a greater effect than changing a vent on a smoker. The heat is also less uniform. One side may face strong radiant energy while the other is exposed mainly to warm air. An infrared thermometer can help you check the surface temperature of a plancha or skillet, but it cannot tell you the effective air temperature around a hanging chicken or pork roast. For that, observation and internal temperature are more useful.
Hold your hand near, but never in, the cooking zone to get a rough sense of how intense the radiant heat is. Watch how quickly fat renders, how fast the surface colors and whether dripping fat causes flare-ups. Rotate or reposition the food before one side becomes too dark.
Open-fire low and slow is less exact than using a thermostatically controlled pellet grill, but it is not random. Distance and placement are your temperature controls.
[INTERNAL LINK: Low and slow cooking over open fire — future supporting article]
| Cooker | Basic setup | Main control |
|---|---|---|
| Kettle grill | Coals on one side and food on the other, or use a charcoal snake | Vent position and the amount of burning charcoal |
| Kamado grill | Small charcoal fire with a heat deflector beneath the food | Restricted airflow and gradual vent adjustments |
| Pellet grill | Keep the diffuser closed and cook above indirect heat | Electronic temperature setting and pellet supply |
| Offset smoker | Maintain a small fire in the separate firebox | Fire size, fuel additions and intake airflow |
| Gas grill | Light one side and place the food above the unlit burners | Burner output and protection from direct heat |
| Open fire | Position the food beside or high above the fire | Distance, height, coal-bed size and repositioning |


How to control low and slow BBQ temperature
Temperature control matters, but precision is often misunderstood. You do not need to hold your smoker at exactly 250°F / 121°C for ten uninterrupted hours. What you need is a reasonably stable cooking range and enough awareness to recognize when the fire is consistently moving in the wrong direction.
Short fluctuations are normal. Opening the lid introduces oxygen and releases heat. A fresh piece of wood or coals may temporarily raise the temperature. Cold meat absorbs energy when it first enters the cooker. Wind and rain can change how much fuel the BBQ needs.
React to trends, not every number on the display.
BBQ thermometers and probes explained
| Thermometer | What it measures | Best use | Main limitation |
|---|---|---|---|
| Pit or ambient probe | Air temperature close to the food | Monitoring the cooking zone during a long cook | Can misread when placed too close to cold meat, metal or direct heat |
| Leave-in meat probe | Internal temperature throughout the cook | Following cooking progress and recognizing the stall | Incorrect placement can produce misleading readings |
| Instant-read thermometer | Internal temperature at one specific point | Checking several areas and testing tenderness near the end | Does not continuously monitor the cook |
| Built-in lid thermometer | Air temperature near the lid or dome | Following general temperature trends | May differ significantly from the temperature at grate level |
| Wireless multi-sensor probe | Internal and estimated ambient temperature | Monitoring the cook remotely without cables | Its ambient sensor can sit too close to the cold meat early in the cook |
| Infrared thermometer | Surface temperature | Checking griddles, skillets and planchas | Cannot measure air temperature or internal doneness |
Pit temperature vs. dome temperature
A built-in dome thermometer measures the air around the lid, not necessarily the temperature next to the food. On some cookers the difference is small. On others, especially during preheating or when the fire sits close to one side, the difference can be substantial.
For low and slow cooking, place an ambient probe close to the food but not directly against it. Keep the tip a few inches or approximately 5–8 cm away from cold meat, metal edges and the main heat source.
The dome thermometer is still useful. It shows whether the cooker is heating, cooling or remaining stable. Just do not assume it represents the exact temperature across the entire cooking grate.
Airflow controls the fire
A charcoal or wood fire needs oxygen. The lower intake vent usually controls how much oxygen reaches the fuel, while the upper exhaust allows hot air and combustion gasses to leave the smoker.
Small adjustments are more useful than repeatedly opening and closing the vents. After changing a vent, give the fire time to respond. On a kettle or kamado, I usually leave the exhaust at least partly open and make most temperature adjustments through the intake. Completely closing the exhaust can trap stale smoke and reduce clean combustion.
An offset smoker needs even more airflow. Its fire should burn rather than smolder. Control the temperature through fire size, fuel additions and intake airflow instead of suffocating the chimney.
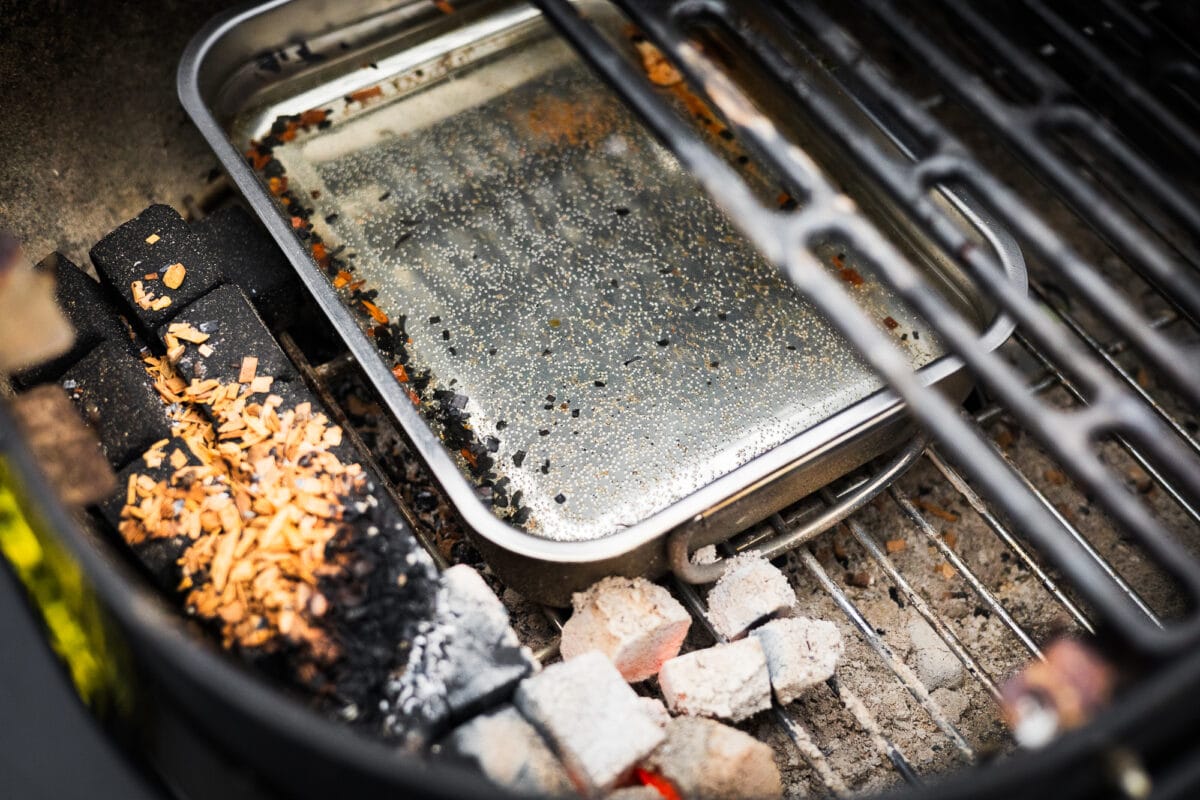
Preheat before adding food
Allow the cooker to approach the desired range before adding the food. This gives you time to check the airflow, make sure the smoke smells clean and identify unexpected hot spots.
A kettle may stabilize relatively quickly. On the other hand does a ceramic kamado need more time because the body itself absorbs and stores heat. A pellet grill may display the target temperature before the full cooking chamber and metal grates are evenly heated. You do not need to wait until every part has reached exactly the same temperature. The goal is to begin with a controlled fire rather than placing expensive meat into a cooker that is still producing thick startup smoke.
Do not chase every fluctuation
If your target is 250°F / 121°C and the temperature moves between 235°F and 265°F / 113°C and 129°C, the cook is still under control.
Intervene when:
- the temperature continues to climb or fall;
- the fire is close to going out;
- smoke becomes thick and unpleasant;
- one side of the food colors much faster than the other;
- a pellet grill displays an error or stops feeding pellets;
- the pit moves toward direct, uncontrolled heat.
Do not intervene simply because the display changes by 5°F or 3°C.
Weather changes the cook
Cold weather increases fuel use and can lengthen preheating. Wind pushes additional oxygen through vents and can make a charcoal fire burn hotter. Rain cools the outside of the cooker, while very dry weather can accelerate surface evaporation. Position the BBQ out of strong wind without using it inside a garage, shed or enclosed space. Never sacrifice ventilation to protect a cook from the weather.
A thermal blanket designed by the cooker manufacturer can help a pellet grill in winter. Improvised flammable insulation does not belong around a hot BBQ.
Do you need a water pan?
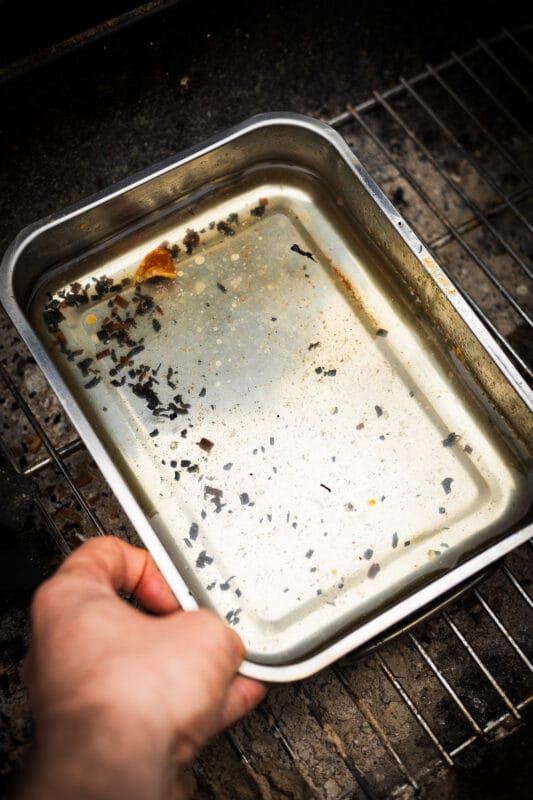
A water pan can help stabilize the cooking environment because heating and evaporating water absorbs energy. It can also reduce direct radiant heat and catch dripping fat, depending on its position. The added humidity may slow surface drying and can help smoke compounds settle on a moist surface. It does not inject moisture into the center of the meat and it does not guarantee a juicy result.
When should you use a water pan?
| A water pan is most useful when | A water pan is less useful when |
|---|---|
| Your cooker tends to fluctuate and needs more temperature stability. | Your cooker already controls heat very effectively. |
| The food is exposed to strong radiant heat from the fire or charcoal. | You are finishing the food over direct heat. |
| You are cooking pork shoulder, brisket or ribs for several hours. | The food is already wrapped in butcher paper or aluminum foil. |
| You need a drip pan to catch rendered fat and protect the cooker. | You need the surface of the food to dry quickly and develop a firm crust. |
| The cooker manufacturer designed the smoker to be used with one. | You want crisp chicken or turkey skin. |
Fill it with hot water so the cooker does not need to spend unnecessary energy heating cold water. Beer, juice and herbs in the pan may smell pleasant, but they contribute little meaningful flavor to the meat.
Want to dive deeper into the science and practical pros and cons? Read our complete breakdown on “Water pan in a smoker: does it really help?” to decide if it’s right for your next cook.


How to create clean flavorful smoke for low and slow BBQ
More smoke does not automatically create better barbecue. The goal is a clean layer of smoke that supports the food instead of covering it with a bitter, ashy taste.
What clean smoke looks and smells like
Clean smoke is often thin, light blue or almost invisible. More importantly, it smells pleasant: like burning wood, toasted aromas and the kind of fire you would be comfortable standing beside.
Thick gray, yellow or white smoke can indicate incomplete combustion, damp fuel, restricted airflow or a fire that has not stabilized. Some white smoke is normal when fresh fuel ignites, but food should not sit in heavy, dirty smoke for hours.
Use your nose as well as your eyes. If the smoke irritates your eyes and smells acrid, it will probably not improve your food.
Wood chunks, chips, pellets and splits
| Wood type | Best used in | Main advantage | What to consider |
|---|---|---|---|
| Wood chunks | Charcoal grills, kettle grills and kamados | Burn longer than small chips and work well during long cooks | A few well-positioned chunks are usually enough |
| Wood chips | Gas-grill smoke boxes and shorter smoking sessions | Heat up quickly and are easy to use in small quantities | Burn faster and may require more attention |
| Wood pellets | Pellet grills and smoke tubes | Provide a consistent fuel source and controlled smoke | Keep them dry; damp pellets can swell, crumble and cause feeding problems |
| Wood splits | Offset smokers and other wood-fired smokers | Can provide both heat and smoke during a long cook | Use small, dry splits with enough airflow to maintain a clean-burning flame |
Can you use too much smoke?
Yes. This is one of the most common beginner mistakes. Yet meat mostly tastes overly smoked or bitter when you’ve used the wrong method, cut the exhaust of dirty smoke or usesd the wrong wood.
Large pieces of meat may spend ten hours or more in the smoker, but that does not mean they need fresh smoke wood for the entire cook. Most of my added smoke is produced during the earlier stages, while the surface is cool and moist.
Once the bark has formed and the meat is wrapped, additional smoke contributes very little. Wrapping also blocks direct contact between the smoke and the food.
Start with less wood than you think you need. You can add slightly more during the next cook. Removing a bitter smoke flavor afterward is impossible.
Should you soak wood chips?
Soaking wood chips is rarely necessary. Wet chips first need to heat and dry before they can produce useful smoke. During that stage they often release steam and thick smoke without improving combustion.
Use dry chips in a suitable smoke box or packet. Control how quickly they ignite through placement and airflow rather than by soaking them in water, beer or juice.
[INTERNAL LINK: Best Wood for Smoking — future supporting article]


The low and slow BBQ process, step by step
Every recipe has its own details, but most low and slow cooks follow the same general path.
1. Choose the right cut
Look for a cut whose structure matches the method. Pork shoulder, brisket, beef chuck and ribs contain enough fat or connective tissue to benefit from time. A lean pork loin can be smoked, but it should be removed at a much lower internal temperature than pork shoulder. Treating every cut as “low and slow meat” is a reliable way to dry out the expensive ones.
2. Trim only what needs trimming
Remove loose pieces that would burn, hard surface fat that will not render properly and thin edges that would dry out long before the rest is ready. You do not need to remove every piece of fat. The goal is an even shape and a surface that can accept seasoning and smoke.
3. Salt and season
Salt can be applied in advance as a dry brine. For larger cuts, seasoning the day before gives the salt time to move deeper into the meat. A BBQ rub then adds spices, herbs and, if desired, sugar.
Apply sugary rubs with additional care when cooking close to radiant heat or when the pit temperature approaches 284°F / 140°C.
A binder such as mustard or oil can help seasoning adhere, but it is not essential. Once cooked, the flavor of a thin mustard binder is usually barely noticeable.
4. Build and stabilize the fire
Light the BBQ early enough to establish clean smoke and a controlled cooking zone. Add only the amount of smoke wood the cook actually needs. Position the drip or water pan, heat deflector and ambient probe before adding the meat. This is easier and safer than rebuilding the cooker around a large pork shoulder.
5. Add the food and monitor the trend
Place the thickest or most heat-tolerant section toward the warmer side. Insert the meat probe into a thick part without touching bone. Close the lid and allow the cooker to recover. Do not immediately adjust the vents because the temperature dropped when cold food was added.

6. Decide whether to spritz
Spritzing is optional. A light spray of water, diluted vinegar, apple juice or another suitable liquid can keep dry edges from hardening too quickly. Wait until the rub has adhered to the surface. Spraying too early may wash it away.
Every time you open the lid, you lose heat and extend the cook. Spritz because the surface needs it, not because a timer says you must spray every 30 minutes.
7. Understand the stall
During a long cook, the internal temperature of a large cut may stop rising around 150–175°F / 66–79°C. This is known as the stall. Moisture evaporating from the surface cools the meat, temporarily balancing part of the heat entering it. The temperature may barely move for several hours.
The meat is not broken and the thermometer is not necessarily faulty. You can:
- wait and allow the stall to pass naturally;
- raise the pit temperature slightly while remaining within your chosen range;
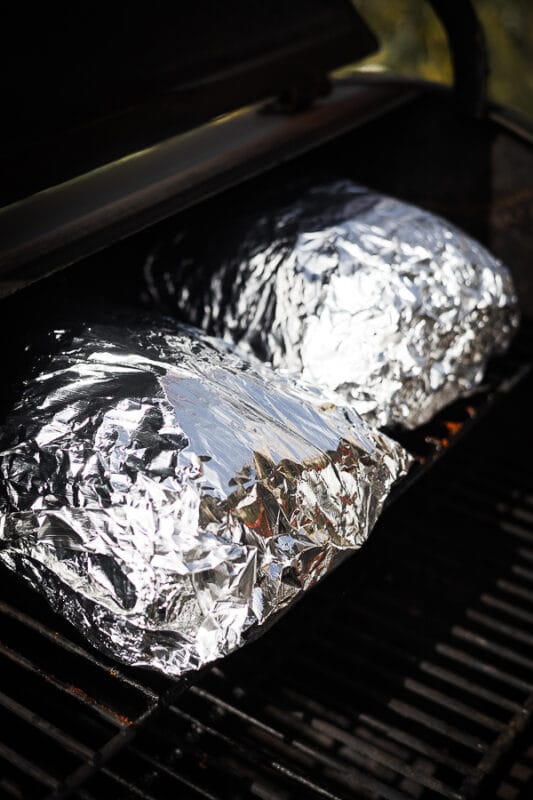
- wrap the meat to reduce evaporation and accelerate the cook.
[INTERNAL LINK: The BBQ stall explained — future supporting article]
8. Decide whether to wrap
Wrapping is a tool, not a mandatory ceremony.
Butcher paper, foil or no wrap?
| Method | Main effect | Advantages | Trade-offs |
|---|---|---|---|
| Butcher paper | Reduces evaporation while allowing some steam to escape. | Speeds up the cook while preserving the bark better than foil. | Retains less moisture and cooks slightly slower than tightly sealed foil. |
| Aluminum foil | Traps steam and moisture inside a tightly sealed package. | Moves the cook along faster and captures rendered juices. | Produces softer bark and a more braised surface. |
| No wrap | Allows continuous evaporation and direct exposure to smoke. | Produces the firmest bark and the strongest smoke exposure. | Takes longer and may dry the surface if the pit is poorly controlled. |
Wrap when the bark has the color and structure you want—not automatically at one exact internal temperature.
9. Cook until tender
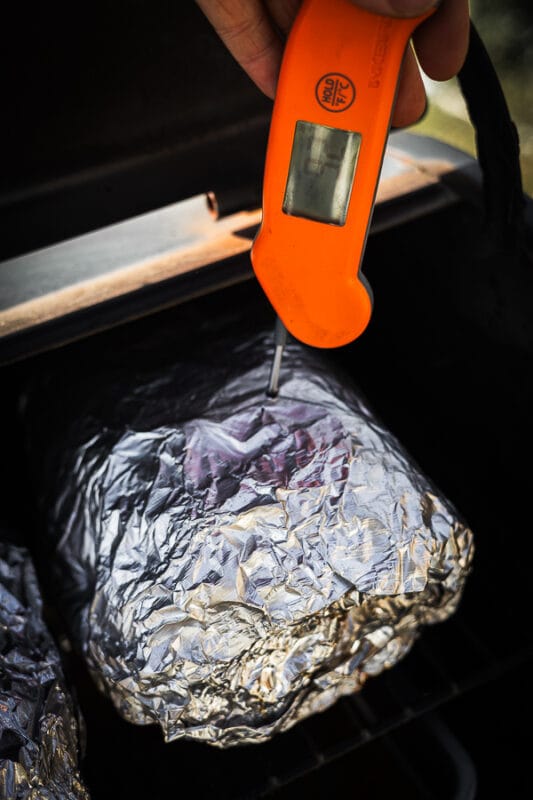
Internal temperature tells you when to begin checking. It does not make the final decision for every cut.
Push an instant-read probe or skewer into several parts of pork shoulder, brisket or beef chuck. When ready, it should slide in with very little resistance.
Ribs should bend easily and show small cracks in the surface when lifted. The meat can pull back slightly from the bones, but that alone does not prove they are done. If you want ribs with a clean bite, remove them before the meat becomes completely loose. “Fall off the bone” is a preference, not the universal definition of perfect ribs.
10. Rest and hold
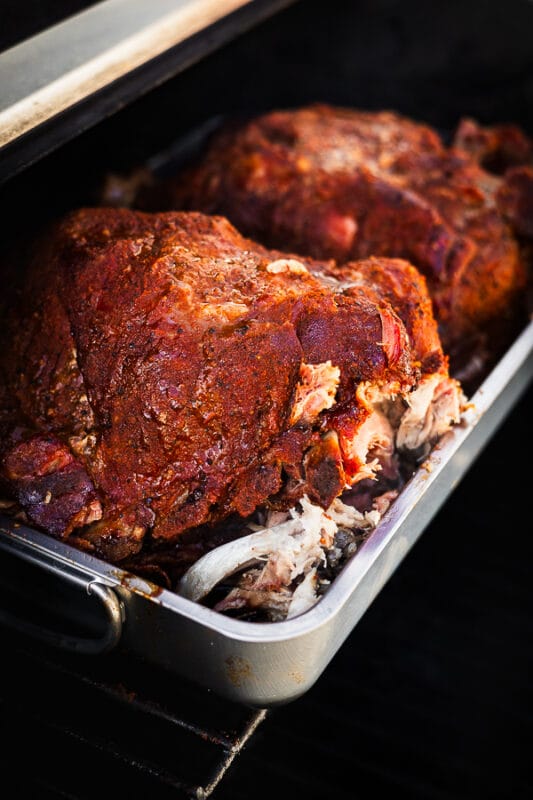
Resting allows the temperature to become more even and gives the surface a chance to stop steaming aggressively before slicing or pulling. Small cuts may need 10–20 minutes. Large cuts such as pork shoulder or brisket benefit from a longer rest and can often be held warm for several hours.
If the meat is wrapped, open the package briefly after cooking to stop excessive carryover before rewrapping for a long hold. Keep hot food at a food-safe holding temperature and do not leave it sitting in the temperature danger zone.
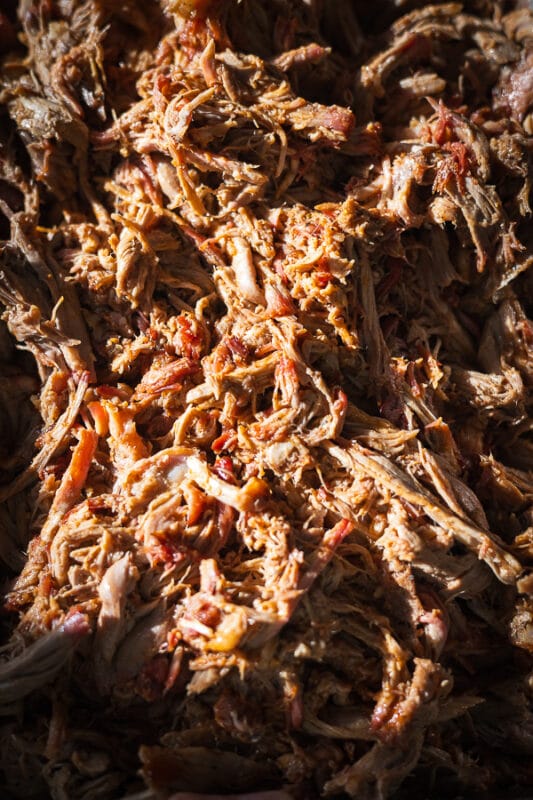
Low and Slow BBQ temperature and doneness chart
The following temperatures are practical starting points. The “usual finish” column describes common BBQ texture, not always the minimum safe temperature.
Low and slow temperature and doneness chart
| Food | Pit temperature | Approximate time | Usual finish | Best doneness test |
|---|---|---|---|---|
| Pork shoulder | 225–275°F / 107–135°C | About 8–14 hours for 6–10 lb / 2.7–4.5 kg | Usually 195–205°F / 91–96°C | The probe slides in easily and the bone feels loose |
| Baby back ribs | 225–275°F / 107–135°C | About 3½–5 hours | Internal readings are difficult to interpret between the bones | Bend test, small surface cracks and little resistance from a toothpick |
| Spare ribs | 225–275°F / 107–135°C | About 4½–6½ hours | Internal readings are difficult to interpret between the bones | Flexible rack, visible surface cracks and the desired bite |
| Beef brisket | 225–275°F / 107–135°C | About 8–16 hours for 10–16 lb / 4.5–7.3 kg | Often 195–205°F / 91–96°C | Probe tenderness, especially through the thickest part of the flat |
| Beef ribs or chuck | 225–275°F / 107–135°C | About 5–9 hours | Often 195–205°F / 91–96°C | Soft between the bones or probe tender throughout |
| Pork loin or lean pork roast | 225–275°F / 107–135°C | About 1½–3 hours, depending on thickness | At least 145°F / 63°C with a three-minute rest | Internal temperature; do not cook it like pork shoulder |
| Lamb shoulder | 225–275°F / 107–135°C | About 5–8 hours for 4–7 lb / 1.8–3.2 kg | Often 195–205°F / 91–96°C for pulling | Probe tender and easy to pull apart |
| Whole chicken | 250–350°F / 121–177°C | About 1½–3½ hours for 3–5 lb / 1.4–2.3 kg | At least 165°F / 74°C in the required areas | Check several areas with a thermometer without touching bone |
| Whole turkey | 275–350°F / 135–177°C | About 4–8 hours, depending on weight and cooking temperature | At least 165°F / 74°C in the required areas | Check the breast, innermost thigh and innermost wing area |
| Hot-smoked salmon | 165–225°F / 74–107°C, But I use 40°C with fresh salmon | About 45–120 minutes, depending on thickness and pit temperature | 145°F / 63°C according to USDA consumer guidance | Internal temperature combined with the desired firmness and flake |
Approximate cooking time can help with planning, but weight alone cannot predict the finish. Shape, thickness, fat, pit temperature, wrapping and weather all matter. A compact 8 lb / 3.6 kg pork shoulder may behave differently from a flatter piece of the same weight.
Always plan extra time. Barbecue can be held warm; hungry guests are harder to manage.
Chicken and Turkey: Smoke flavor or crispy skin?
Chicken and turkey can be cooked low and slow. The question is whether the resulting skin matches what you want.
At lower pit temperatures, the meat warms gradually and has more time in contact with smoke. However, the skin loses moisture slowly and may remain soft or rubbery. A water pan can make this effect stronger. A skinless turkey breast is particularly useful for smoking because you do not have to worry about producing crisp skin. It can be sliced for sandwiches or used in a recipe such as my smoked turkey focaccia with pesto rosso.
At 300–350°F / 149–177°C, fat under the skin renders more effectively and the surface dries faster. The skin has a better chance of becoming bite-through or crisp, but the total smoke exposure is shorter.
Mastering the fire is only half the battle; getting that legendary bite-through skin on a holiday bird requires the right strategy. Learn how I adapted traditional roasting secrets for this epic whole BBQ turkey with soy glaze and level up your next cook!
You therefore have three practical options:
- Cook low and slow throughout.
Choose this when smoke flavor and gentle cooking matter more than crisp skin. - Start low and finish hot.
Smoke at a lower temperature, then raise the heat once the desired smoke color has developed. - Cook hotter from the beginning.
Use approximately 300–350°F / 149–177°C for more reliable skin while still adding smoke.
Drying the poultry uncovered in the refrigerator before cooking can help. Avoid repeatedly spraying the skin, and do not use a water pan unless temperature control or heat protection makes it necessary.
All poultry must reach the required safe internal temperature. For a whole bird, check multiple places without touching bone. Breast and leg meat may reach their best texture at different times, which is one reason spatchcocking can make cooking more even.


The best foods for your first low and slow cook
Pork shoulder
Pork shoulder is forgiving because it contains fat and connective tissue, if you want to dive deeper into target temps and the stall, check out this pulled pork temperature guide. It teaches the influence of temperature on your pork shoulder, bark development, the stall, wrapping and resting in one cook.
The main disadvantage of starting with a pork shoulder is time. Start early and allow a generous holding window.
[INTERNAL LINK: Pulled Pork – three methods]
Pork ribs
Ribs finish faster and make it easy to compare textures. You can test wrapping versus no wrapping or a traditional 3-2-1-style ribs approach against a shorter method. They are less forgiving than pork shoulder because the edges can dry out and the preferred doneness is personal.
Besides low and slow BBQ Ribs there are quite some other techniques to try. Read the article “Five methods to cook BBQ Ribs” and find out what technique you prefer!
Beef chuck
Chuck roast is a useful introduction to smoked beef. It is smaller and generally less expensive than a full brisket but still develops bark and benefits from slow cooking.
It can be sliced when tender enough or cooked further for pulled beef.


Chicken thighs
Chicken thighs are affordable and naturally juicy. They take smoke well and finish relatively quickly. Cook them hotter if you want better skin.
Hot-smoked salmon
Making hot-smoked salmon is a good way to learn gentle temperature control and restrained smoke use. It does not need an all-day cook, but it punishes dirty smoke and excessive heat quickly.
Vegetables and alternatives
Low and slow BBQ is not limited to large pieces of meat. Cabbage, onions, squash, mushrooms, beans, nuts and firm cheeses can all benefit from controlled smoke. They do not all need the same low temperature or long cooking time. Use smoke as an ingredient rather than forcing every food into the same process.

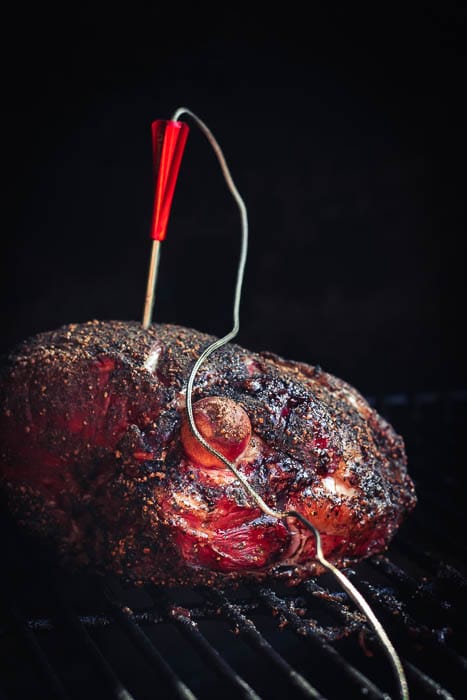

Low and slow BBQ recipes and techniques
Use this hub as a starting point and choose the recipe that matches the skill you want to practice.
Pulled pork
Pulled pork is the best complete training session. A traditional unwrapped method creates a strong bark but requires patience. Butcher paper offers a useful balance. Foil speeds up the cook and captures more liquid but softens the surface in order to get a quick pulled pork result in about 6 hrs by using the Texas Crutch method.
[INTERNAL LINKS: Pulled Pork: three methods to come. ]
Pork ribs
Ribs allow you to compare wrapping, pit temperatures and preferred bite without committing to an overnight cook. The famous 3-2-1 method is useful, but it is not suitable for every rack or every desired texture.
Find out five different techniques to cook Ribs on your BBQ in this post: “BBQ Ribs – five methods” or read more about the low and slow technique for making 3-2-1 BBQ ribs with the Hot Honey BBQ sauce recipe!
Hot-smoked fish
Fatty fish accepts smoke readily, so use mild wood and a clean fire. Salmon also demonstrates why lower cooking temperatures can matter for texture. If you’d like to read more about this technique? Definetely check this delicious “hot-smoked Salmon” recipe. Though it’s “hot-smoked” it’s a low and slow recipe rather than the cold smoked salmon I also often prepare!
Cedar-plank salmon is related but belongs primarily to the fish and live-fire cluster because distance, plank position and radiant heat play a larger role.
[RELATED LINK: Cedar Plank Salmon]
Beef, lamb and pork roasts
Brisket, beef ribs, chuck and lamb shoulder are natural low and slow subjects. Pork roast requires more caution because some roasts are lean and should not be cooked to pulling temperatures.
Dutch-oven beef stew may cook slowly on the BBQ, but it belongs to the Dutch-oven cluster rather than the core smoking cluster.
Reverse sear also begins with gentle indirect heat, but its purpose is different. It deserves a separate technique hub.
Common low and slow BBQ mistakes
| BBQ mistake | Advice and solution |
|---|---|
| Starting with dirty smoke | Wait until the heavy startup smoke has cleared and the fire smells clean before adding the food. |
| Constantly adjusting the vents | Make small adjustments and give the cooker enough time to respond before changing anything again. |
| Trusting one thermometer blindly | Check the probe placement and compare several areas of the meat near the end of the cook. |
| Opening the lid too often | Open the cooker when you need to check, rotate, spritz or wrap—not simply because you are curious. |
| Adding wood throughout the entire cook | Long smoke exposure can become bitter. Most added smoke wood is useful during the earlier stages. |
| Wrapping automatically | Wrap to accelerate the cook or protect the surface—not only because the thermometer reached a number in someone else’s recipe. |
| Cooking strictly by time | Use time for planning. Internal temperature and physical tenderness determine when the food is ready. |
| Cutting the meat immediately | Allow large cuts to rest. Cutting too soon releases more liquid and makes clean, accurate slicing difficult. |
| Assuming ribs must fall off the bone | Some people prefer very soft ribs. Others want meat that pulls cleanly from the bone while retaining a clear bite. Cook for the texture you enjoy. |
Food safety during low and slow BBQ
Low and slow barbecue requires the same careful food handling as indoor cooking. Keep raw meat refrigerated until preparation. Prevent raw juices from contacting cooked food, utensils or serving surfaces. Clean thermometer probes before moving them between raw and cooked products.
USDA food-safety temperature guide
| Food or process | Temperature | Important note |
|---|---|---|
| Whole cuts of beef, pork, lamb and veal | 145°F / 63°C | Allow a minimum three-minute rest before carving or serving. |
| Ground meat | 160°F / 71°C | Measure the temperature in the center of the food. |
| Chicken and turkey | 165°F / 74°C | Check several areas without allowing the probe to touch bone. |
| Fish | 145°F / 63°C | Measure the thickest part of the fish. |
| Smoker or BBQ chamber | 225–300°F / 110–150°C | USDA guidance recommends maintaining this range when smoking meat and poultry. |
| Hot holding after cooking | 140°F / 60°C or above | Keep cooked food above this temperature while holding it for service. |
| Cooling leftovers | Refrigerate promptly | Divide large portions into shallow containers instead of cooling a whole wrapped cut on the counter. |
These are safe minimums recommendend by the USDA for smoking Meat and Poultry, not automatic texture targets. Pork shoulder and brisket must usually cook far beyond their minimum safe temperature to become tender. Pork loin should not.

What years of low and slow BBQ have taught me
After more than 15 years of cooking outdoors, I still take notes and still have cooks that do not follow the expected timeline. That is not a failure of the method. It is part of cooking with fire.
The most useful lessons have remained remarkably simple.
- 225°F / 107°C is not a magic number. A steady range and clean fire matter more than holding one exact temperature.
- Smoke should support the food. If smoke is the only thing you can taste, more wood was probably not the answer.
- Every BBQ has its own behavior. Recipes provide a route, but your cooker, fuel and weather determine how that route develops.
- Temperature is information, not the final verdict. Use it to know when to start checking tenderness.
- Wrapping is a choice. It changes speed, bark and moisture. There is no reason every cook must follow the same method.
- Finishing early is better than finishing late. Large cuts can be held warm. They cannot be rushed into tenderness because dinner was planned too precisely.
Writing Wood Pellets Taste Better and testing recipes on different pellet grills reinforced the same point: convenience does not remove the need to understand the process. A controller can manage the fire, but you still decide how much smoke you want, when the bark is ready and what final texture you are looking for.
The real skill in low and slow BBQ is not perfect control. It is learning when the cook needs your attention and when it is better to leave it alone.
Frequently Asked Questions about low and slow BBQ
What is the best temperature for low and slow BBQ?
For pork shoulder, ribs, brisket and similar cuts, 225–275°F / 100–140°C is a useful range. You do not need to maintain one exact temperature.
Is 225°F or 250°F better for smoking meat?
Both work. At 250°F / 121°C, the cook usually moves slightly faster without leaving the traditional low and slow range. Choose the temperature your cooker holds most comfortably. The difference won’t be that big worth stressing for.
Can I cook low and slow on a regular charcoal grill?
Yes. Create an indirect zone with the fuel on one side or use a snake method for a longer, gradual burn.
Can I smoke meat on a gas grill?
Yes, although the smoke profile will differ from charcoal or wood. Switch off the burners below the food and use a smoke box or suitable wood-chip packet over a lit burner.
How long does low and slow BBQ take?
It depends on the cut, thickness, pit temperature, wrapping and weather. Large cuts may need eight to sixteen hours, while ribs, poultry and fish can finish much sooner. Plan extra time and judge doneness by temperature and texture.
Should I use a water pan?
Use one when it helps stabilize heat, block radiant energy or catch drippings. Avoid it when you want crisp skin or rapid surface drying.
How often should I add wood?
Usually during the earlier part of the cook. There is rarely a need to add fresh smoke wood for the entire session. Unless you are using a stickburner BBQ.
Why did the internal temperature stop rising?
The meat probably entered the stall. Surface evaporation cools the meat and temporarily slows the rise in internal temperature.
Should I wrap in butcher paper or foil?
Butcher paper generally protects bark better. Foil cooks faster and retains more liquid but softens the surface. You can also choose not to wrap.
Does meat stop absorbing smoke at a specific temperature?
No. Smoke deposition changes gradually as the surface becomes warmer, drier and covered with bark. There is no universal cutoff temperature.
What is the easiest meat to smoke?
Pork shoulder is the most forgiving complete low and slow project. Chicken thighs and hot-smoked salmon are good shorter options.
Can chicken be cooked low and slow?
Yes, but lower temperatures often create soft or rubbery skin. Cook hotter or use a hotter finishing stage if crisp skin is important.


Start your first low and slow cook
Low and slow BBQ becomes much easier once you stop treating every temperature as a strict command. Build a clean fire, create an indirect cooking zone and aim for a stable range. Give smoke time to add flavor, but do not confuse more smoke with better barbecue.
Use internal temperature to follow the cook and tenderness to decide when tough cuts are ready. Wrap when it serves a purpose, allow enough time to rest and make notes about what happened.
For a first long cook, start with pork shoulder. If you want a shorter session, choose ribs or hot-smoked salmon. Each one teaches a different part of the process, and none requires you to own a professional smoker.
The best low and slow barbecue does not come from controlling every degree. It comes from understanding your fire, your food and the result you want to serve.
