
The first time I planned on making my own bacon, I couldn’t help myself… Before I had even finished taking the photos for this blog post, a slice was already waiting on the cutting board for a taste test. Patience is a genuine challenge when freshly smoked bacon is hanging in the fridge. Before you can finally taste it, you’re several weeks down the line to achieve that perfect texture and flavor. The taste was spot on right away, the texture was firm, and the combination of spices, smoke, and pork fat worked exactly as hoped. Wondering how the process went? Let me break it down for you!
Disclosure: This post may contain affiliate links. As an Amazon Associate, I earn from qualifying purchases. If you buy through one of these links, I may receive a small commission at no extra cost to you. All opinions are my own.
Original post dating from 17 november 2017. Recent big update on procedure description (september 2026).
Just don’t turn this cook into a quick job for a rushed Sunday afternoon. After all, you are working with raw meat that needs weeks to cure, cold-smoke, and dry in a controlled environment. It’s a fantastic step forward for anyone looking to make their own charcuterie, but precision and hygiene are paramount. So take your time to do things right.
Drying meat yourself isn’t difficult, but it requires meticulous work under the right conditions. Use your senses primarily to disqualify a product: gas formation, a slimy surface, an off smell, or unwanted mold are all reasons to discard the meat.
Conversely, a normal smell, color, and texture do not prove that every step was executed safely. If the curing salt dosage, refrigerator temperature, or conditions in your drying cabinet fell clearly outside the specified limits, take no risks and throw the meat away.
This exact formula uses Colorozo curing salt containing 0.6% sodium nitrite. It is not the same product as Prague Powder #1, Insta Cure #1 or other American curing salts, which are commonly far more concentrated. Never substitute them gram for gram or teaspoon for teaspoon. If you cannot obtain curing salt with the exact 0.6% composition, use a complete formula developed for the specific cure you own rather than improvising a conversion.
Homemade bacon: the short answer
For this pancetta-style bacon, a flat piece of pork belly is coated with a precisely weighed mixture of Colorozo curing salt (0.6% sodium nitrite), regular salt, brown sugar, and spices. It cures under vacuum in the fridge for three weeks at 34–40°F (1–4°C). After curing, you dry the surface, cold-smoke the pork below 77°F (25°C), and hang it in a controlled curing chamber at 50–59°F (10–15°C) with around 70–75% relative humidity. You finish when the meat reaches a 30 to 33% weight loss—for a 1.1 lb (500 g) slab, your target end weight is roughly 0.74–0.77 lb (335–350 g).
Your smoker or grill acts strictly as a cold-smoke chamber here, never as an oven. The smoke builds depth and flavor, but it does not cook the bacon. Achieving a safe, incredible end result comes down to a tight hurdle concept: accurate curing, strict refrigeration, controlled drying, stable airflow, and proper moisture loss.

Is this bacon or pancetta?
When I first jotted down this recipe, I simply labeled the project “homemade bacon.” Looking back, that was a bit oversimplified. The word bacon is used pretty broadly, American streaky bacon (pork belly), back bacon (pork loin), or traditional breakfast bacon are typically cured, smoked, and fried up right away.
If you look at the actual process used here, it leans much closer to pancetta tesa, the flat Italian style of cured pork belly. After dry-curing, this recipe revolves around a long, controlled drying phase.
Yet, it’s not 100% authentic Italian pancetta either. While the classic Italian version stays unsmoked, I intentionally give it a barbecue twist by cold-smoking the meat below 77°F (25°C) with hickory wood. In charcuterie, cold smoke is primarily used for flavor and may act as an additional surface hurdle within a complete, controlled process. It does not replace accurate curing, refrigeration, controlled drying or cooking when the recipe requires it.
| Product | Cut | Typical Process |
|---|---|---|
| Streaky bacon | Pork belly | Cured, often smoked, and cooked before serving |
| Back bacon | Pork loin | Cured, sometimes smoked, and cooked before serving |
| Pancetta tesa | Flat pork belly | Salt-cured and air-dried |
| This recipe | Flat pork belly | Dry-cured, cold-smoked, and air-dried under controlled conditions |
More homemade charcuterie
Want to see how this pancetta-style bacon fits alongside sausage, lomo, jerky and other curing projects? Explore my complete homemade charcuterie guide and choose the next technique you want to master.
Choosing the pork belly and equipment
Choose a fresh, skinless piece of pork belly with an even thickness and a balanced ratio of meat to fat. Fat isn’t just there for moisture; it carries the deep flavor of the spices and smoke. My original test used roughly 1.1 lb (500 g) of Duke of Berkshire pork belly. That compact size is ideal for keeping full control over the process.
A larger slab works fine too, but thickness dictates how quickly and evenly the cure penetrates to the core. Yet, the total weight remains crucial, it is the exact foundation for calculating your salt and curing ratios. Stick strictly to the recipe formulas: never tweak the salt percentages, spice quantities, or curing times independently of each other.
Essential Equipment:
- Digital precision scale: Essential for accurately measuring curing salts and spices down to fractions of a gram.
- Vacuum sealer & food-safe bags: Ensures an even, hygienic dry cure (equilibrium curing).
- Cold smoke generator (CSG) & fine wood dust: Delivers controlled smoke flavor without building up heat in the smoker. If you’re new to the technique, check out my complete guide on cold smoking first.
- Kitchen twine or a food-safe meat hook: For hanging the pork belly freely during the drying phase.
- Curing chamber or drying space with a thermo-hygrometer: Maintains the critical balance between temperature and relative humidity.
- Notebook or digital log: Indispensable for tracking start dates, temperatures, humidity, and daily weight loss.
As you can see, you don’t need an arsenal of complex machinery for this project. However, the precision of the tools you do use is non-negotiable. Accuracy and control are paramount in charcuterie to ensure a clean, safe process.
If you want to take your charcuterie to the next level and age meat completely worry-free, a dedicated curing cabinet is a smart (yet more expensive) investment. Very few of us have a cool basement or pantry where conditions naturally hover at a steady 50–59°F (10–15°C) and 70–75% relative humidity year-round. A dedicated curing cabinet (for instance this one on Amazon) can make it easier to monitor temperature and relative humidity, but it does not make the process worry-free or guarantee a safe result. You still need accurate curing, independent monitoring, gentle airflow and regular checks throughout the drying stage.

How to make homemade bacon (pancetta tesa-style)
Making your own bacon is an absolute milestone for any barbecue and charcuterie enthusiast. Forget those watery, paper-thin supermarket slices that shrink instantly and end up boiling in their own juices. When you take control of the entire process, from selecting the right slab of pork belly to accurately measuring the cure and balancing the smoke, you unlock charcuterie on a whole different level.
In this recipe, we’re crafting bacon pancetta tesa-style. The secret to a successful pancetta tesa isn’t complex gadgetry, but rather a combination of three core techniques and safety hurdles:
- Equilibrium curing (EQ cure): Exact ratios of salt, curing salt, and spices penetrate deep into the meat, ensuring it never becomes overly salty.
- Controlled cold smoking: A subtle dose of wood smoke at low temperatures adds irresistible, artisanal depth.
- Patient air-drying: By allowing the meat to lose moisture under controlled conditions, the flavors intensify, creating that firm, signature texture made for razor-thin slicing.
It takes a little patience, but the moment you lay that first slice of homemade pancetta tesa on the cutting board or sizzle it in the pan, you’ll never look back.
Step 1: Dry-cure the pork belly
This recipe relies on an equilibrium cure (EQ cure). The salt, curing salt, and sugar are calculated precisely against the exact weight of the pork belly, with everything remaining sealed in the bag throughout the curing period. That makes accurate weighing non-negotiable.
For 17.6 oz (500 g) of pork belly, the base formula uses:
- 0.42 oz (12 g) Colorozo (containing 0.6% sodium nitrite)
- 0.28 oz (8 g) plain sea salt or kosher salt
- 0.35 oz (10 g) brown sugar
- Spices: Coriander, basil, black pepper, cumin, onion powder, and garlic powder (see full recipe card below for exact spice quantities)
Method:
- Weigh and record: Weigh the pork belly and log its exact raw weight.
- Apply cure and seal: Thoroughly mix the curing salt, plain salt, sugar, and seasonings. Coat every surface of the meat, then transfer the pork along with every last grain of the curing mixture into the vacuum bag. Seal it completely, and write the date and starting weight on the bag.
- Cure (3 weeks): Refrigerate for three weeks at 34–40°F (1–4°C), flipping the bag every few days to ensure even distribution. Safety Tip: If the bag inflates, leaks, or loses its vacuum seal, discard the meat immediately.
- Rinse and form pellicle: After three weeks, briefly rinse off loose seasonings and surface salt with cold water, then dry the pork thoroughly. Place it uncovered on a wire rack in the refrigerator for 12–24 hours. The surface should feel dry and slightly tacky, this pellicle layer allows the cold smoke to settle evenly.
Step 2: Cold-smoke the pork belly
Turn your grill or kamado into a ventilated smoke chamber. A cold smoke generator (CSG) allows fine smoke to flow continuously over the pork without adding heat.
- Wood selection: I use hickory for 10 hours to get the assertive, deep smoke profile of the original recipe. If you prefer a subtler flavor, choose beech or apple wood, or simply reduce the smoking time.
- Duration: Approximately 8–10 hours, depending on your preferred smoke intensity.
- Chamber temperature: Keep the temperature inside the smoker strictly below 77°F (25°C), and preferably below 68°F (20°C). If the weather is too warm, postpone the session to a cooler day or night.
- Airflow: Aim for a gentle, steady stream of thin blue smoke rather than filling the chamber with dense, stale smoke.
Cold smoking adds depth of flavor and color while supporting the curing process, but it does not cook or sanitize the meat. For full details on tuning your generator, selecting wood dust, and managing airflow, check out my complete cold smoking guide. Cold smoking during warm (summer) days is strongly discouraged!

Step 3: Dry the bacon under controlled conditions
After cold smoking, weigh the pork belly again and record this intermediate weight. Important: always calculate the final weight loss starting from the original raw weight. Hang the pork freely in a controlled curing chamber or converted refrigerator with gentle, indirect airflow.
- Temperature: Aim for a stable 50–59°F (10–15°C).
- Relative Humidity: Hover around 70–75%.
- Airflow: Ensure gentle circulation, never position a fan blowing directly at the meat to prevent case hardening.
- Clearance: Hang the pork belly so it does not touch the walls, drip tray, or another piece of charcuterie.
💡 DIY Tip: A refrigerator can sometimes be adapted into a curing chamber, but it is not a plug-and-play solution. You still need independent control and monitoring of temperature, relative humidity and gentle airflow. The linked DIY project can offer practical build inspiration, but it should not be treated as a validated food-safety protocol for this recipe. For broader background on dry-curing and charcuterie techniques, Charcuterie by Michael Ruhlman and Brian Polcyn can serve as a useful reference alongside current food-safety guidance.
Guide by weight, not by the calendar
Weigh the meat at least once a week and record your measurements accurately. For a starting weight of 17.6 oz (500 g), aim for a target weight loss of 30% to 33%. This means the final finished weight should land between 11.8 oz and 12.3 oz (335–350 g).
How long this process takes depends on meat thickness, fat-to-lean ratio, airflow, and chamber stability. Never rely on a fixed number of days or a date on the calendar. Weight loss of 30–33% and an evenly firm texture are practical process endpoints, provided that the cure, refrigeration and curing-chamber conditions remained controlled throughout. Neither weight nor texture can prove safety on its own.
An inflated curing bag, sliminess, a foul odor, or unexpected mold growth are clear signs to discard the meat immediately. However, a normal smell and appearance do not automatically guarantee that every safety step was properly maintained. If your cure ratio, refrigeration temperatures, or curing-chamber parameters fell outside safe ranges, play it safe and discard the batch—cooking or frying will not fix a flawed curing process.
Why a regular refrigerator is not a curing chamber
A household refrigerator runs significantly colder, typically around 37–40°F (3–4°C)—and is considerably drier than the ideal curing environment of 50–59°F (10–15°C) at 70–75% RH. These conditions cause the outer layer of the meat to dry out and harden prematurely, before moisture can migrate evenly from the interior. This issue, known as case hardening, traps remaining moisture inside the meat and stalls proper drying.
Without a controlled drying setup for humidity and temperature, cured and smoked pork belly that is cooked or pan-fried before serving is a much safer and more appropriate first project to master before moving on to air-cured charcuterie.
Common mistakes when making bacon (and how to avoid them)
Making your own bacon is a rewarding craft, but it requires absolute precision. When dry-curing meat, the margins for error are small, and a minor misstep can mean the difference between a handcrafted delicacy and a ruined project. These are the four most common pitfalls in the process, and how to avoid them.
1. Interchanging curing salts without checking concentration
Colorozo salt, European nitrite curing salt, and American curing salts (such as Insta Cure #1 or #2 / Prague Powder) are absolutely not 1-to-1 interchangeable. They contain vastly different concentrations of sodium nitrite. Always check the exact concentration on the packaging and only follow recipe quantities formulated for that specific product.
Under-dosing curing salt gives harmful bacteria (like Clostridium botulinum) free rein, while over-dosing is toxic and dangerous to your health. When working with curing salts, precision is not a luxury—it is an absolute safety requirement.
2. Confusing smoke with cooking
Cold smoking is purely for flavor development and surface protection. Do not let the deep color and mouthwatering aromas after cold smoking fool you. At this stage, the pork belly is still completely raw. Cold smoking is purely for flavor development and surface protection; the actual drying process is only just beginning.
Cold smoking takes place below 77°F (25°C), so the meat does not cook and still contains too much available moisture for room-temperature storage. At this stage, you are handling cured but uncooked, high-moisture pork. Do not treat it as finished or shelf-stable; the controlled drying stage still has to follow.
3. Drying the surface too fast (Case hardening)
Humidity that is too low or a fan blowing directly onto the meat will quickly create a tough, leathery crust on the exterior. This traps internal moisture inside the meat, creating serious safety risks. Always ensure gentle, indirect airflow and a stable relative humidity of 70–75%.
This phenomenon is known as case hardening. When the outer layer seals prematurely, moisture in the center can no longer escape. Not only does the meat dry unevenly, but the trapped internal moisture creates an ideal breeding ground for unwanted bacteria and internal spoilage—even while the outside looks perfectly cured.
4. Relying solely on weight loss
While a target weight loss of 30% is an excellent benchmark, the scale alone cannot reveal what happened during the curing or drying phases. Never use weight as your single point of truth. Always evaluate the full picture: combine your scale readings with logged temperature and humidity measurements, as well as a careful inspection of the meat’s texture and surface.
A 30% weight reduction can give a false sense of security if the meat dried unevenly (for instance, due to case hardening). The exterior may have lost excessive moisture while the core remains dangerously wet. Relying blindly on the scale risks slicing into an unsafe product that can spoil internally, or serving bacon with an unbalanced, rubbery texture.
Serving and storing pancetta-style bacon
Slice the dried pork belly thinly and use it just as you would pancetta: crisp it beside eggs, render it into a sauce, wrap it around vegetables, or use it to build deep flavor in a stew. For a classic carbonara, homemade guanciale remains the more traditional choice.
After a meticulously executed curing, smoking, and drying process, this pancetta-style pork belly is traditionally eaten paper-thin without further cooking. However, a home process without professional conditions, process validation, or water-activity testing cannot offer an absolute safety guarantee. If you want an extra safety margin, have any doubts about your process control, or are serving vulnerable individuals, cook the bacon thoroughly before serving.
Keep the finished bacon refrigerated at 40°F (4°C) or below, use a clean knife and wrap cut surfaces carefully. Have you caught the bug for drying and cold smoking? Then cold-smoked lomo and cold-smoked, dried duck breast make fantastic next projects to try.
Made this pancetta-style bacon?
Use the stars in the recipe card to share how the curing, smoking, and drying stages worked for you. Your notes may help another backyard cook approach a first charcuterie project with confidence.
Fired up this recipe? A quick 5-star rating takes two seconds and helps fellow pitmasters find the real Belgian deal.
Recipe: cold-smoked, pancetta-style homemade bacon
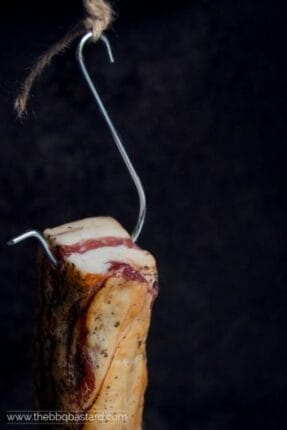
Cold-smoked pancetta-style homemade bacon
Equipment
- Wire rack for the refrigerator
- Kitchen twine or food-safe meat hook
Ingredients
For the pork belly
- 500 g skinless pork belly evenly thick and well marbled
For the dry cure
- 12 g Colorozo curing salt containing 0.6% sodium nitrite do not substitute Prague Powder #1, Cure #1, Prague Powder #2, Cure #2 or another curing product gram for gram
- 8 g plain salt
- 10 g brown sugar
- 5 g ground coriander
- 5 g dried basil
- 2 g ground black pepper
- 2 g ground cumin
- 1 g onion powder
- 1 g garlic powder
For cold smoking
- fine, food-grade hickory smoking dust enough for 8–10 hours of cold smoking
Instructions
Dry-cure the pork belly
- Pat the pork belly dry, weigh it accurately and record the original raw weight and date. Calculate the target weight before you begin: a 30–33% loss from 17.6 oz (500 g) gives a target of approximately 11.8–12.3 oz (335–350 g).
- Thoroughly combine the Colorozo, plain salt, brown sugar and all seasonings. The listed curing-salt quantity applies only to 12 g of Colorozo containing exactly 0.6% sodium nitrite for 500 g of pork belly.
- Coat every surface of the pork belly with the mixture. Transfer the pork and every bit of the cure to a vacuum bag, vacuum-seal it and write the date and starting weight on the bag.
- Cure the pork belly for three weeks in the refrigerator at 34–40°F (1–4°C). Turn the bag regularly so the cure and released liquid remain evenly distributed. Discard the pork if the bag inflates, leaks or loses its seal.
- Remove the pork from the bag, briefly rinse away loose seasoning and excess surface salt, and pat it thoroughly dry.
- Place the pork uncovered on a rack in the refrigerator at 34–40°F (1–4°C) for 12–24 hours. The surface should feel dry and may become slightly tacky; this pellicle helps the smoke adhere evenly.
Cold-smoke the pork belly
- Loosely fill the cold smoke generator with fine hickory smoking dust. Do not pack the dust tightly, or the smoldering path may go out.
- Light the smoking dust and wait until it smolders steadily and produces a thin stream of smoke. Place the cured pork in the smoke chamber without allowing it to touch a wall or another food.
- Cold-smoke the pork for 8–10 hours. Keep the chamber below 77°F (25°C), and preferably below 68°F (20°C). Postpone the session if warm weather prevents you from holding that range. Cold smoking adds flavor but does not cook or sanitize the pork.
- Remove the pork from the chamber, allow the surface smoke to dissipate briefly and weigh it again. Record this as an intermediate measurement; continue to calculate final weight loss from the original raw weight.
Dry the pork belly under controlled conditions
- Tie the pork belly with kitchen twine or attach it to a food-safe meat hook. If you use clean cheesecloth, wrap it loosely so the surface can still breathe.
- Hang the pork freely in a controlled curing chamber at 50–59°F (10–15°C) and approximately 70–75% relative humidity, with gentle indirect airflow. Do not allow it to touch a wall, drip tray or another piece of meat.
- Weigh the pork regularly and record the progress. Dry it until it has lost 30–33% of its original raw weight and feels evenly firm. From a 17.6 oz (500 g) starting weight, the target is approximately 11.8–12.3 oz (335–350 g). The time required depends on thickness, fat content, airflow and chamber stability.
- Keep the finished bacon refrigerated at 40°F (4°C) or below. Traditional pancetta-style products may be served in very thin slices after a carefully controlled curing and drying process, but a home process without professional validation or water-activity testing cannot provide an absolute safety guarantee. Cook it thoroughly for an additional safety margin, whenever process control is uncertain, or when serving anyone at increased risk from foodborne illness.
Notes
- Meneer Wateetons, Over Charcuterie, pp. 69–70: pancetta tesa and controlled drying.
- USDA FSIS — Ready-to-Eat Fermented, Salt-Cured and Dried Products Guideline.
- National Center for Home Food Preservation — Curing & Smoking.
- Minnesota Department of Agriculture — Smoking and Curing.
Frequently asked questions about homemade bacon
Is this authentic Italian pancetta?
No. While the flat shape, dry cure, and controlled drying are inspired by Italian pancetta tesa, the hickory cold smoke adds a distinct barbecue character that is not traditional for authentic Italian pancetta.
Can I use Prague Powder #1 instead of Colorozo?
Not as a 1:1 substitute. This recipe uses European Colorozo salt containing 0.6% sodium nitrite. American Cure #1 / Prague Powder #1 is roughly ten times more concentrated (6.25% sodium nitrite). Always calculate your curing salt based on the exact nitrite percentage specified on your product label.
Can I dry the pork belly in a regular refrigerator?
A household refrigerator is usually too cold and dry compared to the ideal 50–59°F (10–15°C) and 70–75% RH drying conditions. This dry environment can cause case hardening—drying out the exterior too quickly while trapping moisture inside. A dedicated curing chamber is strongly recommended.
Why target a 30–33% weight loss?
Moisture loss firms up the meat and concentrates its savory flavor. Reaching 30–33% weight loss is a practical benchmark for texture, but it is not a standalone safety guarantee. Proper salt percentages, temperature control, airflow, and hygiene remain equally essential.
Do I need to cook this bacon before eating?
Traditional pancetta-style meats are served paper-thin without cooking after a fully validated curing process. However, because cold smoking adds flavor without applying heat, and home setups lack laboratory testing for water activity, cooking provides an extra safety margin. Always heat thoroughly if you are unsure about your process or when serving vulnerable individuals.


I am sorry you need to do more research before publishing recipes. Sodium nitrate (cure #2, not sodium nitrite (cure #1), is used for drying meats. What you’really making is a smoked pancetta. Meats hung for 30 days or more require the time release properties of the nitrate. Worse yet your cure calculations are nearly enough to poison people. The maximum cure allowed by law in bacon is .32% or 200ppm. Then to reach 4% salt (a nearly inedible %) you add the rest of the percentage in kosher salt.
Hey Walt!
Thank you for stopping by and taking the time to read and comment to the post! You are completely right about the Pancetta! I found out after I published the post…
On the proportions on the other hand there might be a misunderstanding. The meat was dried for 21 days and Nitrite salt is not the same as pink salt (cure #1). Nitrite salt contains is 0.6 percent nitrite. The rest is regular salt. Over here in Belgium we can only by this kind of salt. I’ll make an edit on this to make sure no person is making the mistake! Concerning the inedible % you should try it! It’s not at all inedible).
But once again thank you for stopping by! I know I can still learn a lot on this subject so comments like this help us all!
– “Nitrite salt contains is 0.6 percent nitrite. ”
You’re still getting it wrong. Cure #1 (what you’re calling “nitrite salt”) contains 6.25% sodium nitrite…NOT 0.6%.
You need to stop blogging about a subject about which you are so fundamentally lacking in even basic knowledge, as you’re going to make people who follow your advice sick….or worse.
OK, never mind. I see that “nitrite salt” is an EU thing that restricts nitrite content to 0.6%. Nonetheless, your descriptions make it clear that you don’t really know what you’re doing.
Hey, you are right indeed. Concerning not knowing what I’m doing: the only thing wrong was the name and they are often misused… I read a lot on this subject before and still learn. Yet this is a safe recipe or do you have other arguments to tell me it’s not? If so I would love to read them!
Cheers
Hey,
Thank you for your comment it learns me my explanation is not clear yet and I’ll change it again tonight. Over here in Belgium Cure#1 is forbidden so I really know what you are saying. Yet we can buy butcher salt or nitrite salt with 0.6 percent nitrite. Clearly this is something unfamilliar out of this country causing misunderstandings. I will add a conversion calculation tonight to keep it safe.
Kind regards,
Simon
Hi BBQ B! We have a unique problem in Singapore trying to make bacon. First up is that we cannot get hold of Curing Salt or Nitrate salt, since it’s import is heavily regulated by Government. So thus far I’ve been using normal course salt instead. Also I have not been able to find non-Iodised salt – but can explore further on this!. Number two is that we simply do not have space to do cold/hot smoke in a bbq setup (living in small apartments). I do however have a cold room, but until now I have rubbed my pork belly in brown sugar, whiskey and salt, hanged it in my fridge for 21 days, and called in bacon. Pan fried it tasted ok… Going forward we want to add the smoke flavour, hence we are thinking of using liquid smoke and doing the wet cure thing for three days before hanging up to dry-cure for 21 days. Any thoughts/tips on this approach?
You can try I think it might work but never tried liquid smoke! Maybe you can cold smoke it in a park but that takes time. A cold smoke generator is pretty small and can be used in a box… good luck! Curious to hear how it turned out!!! Cheers
Heel mooi recept, echter kan ik niet terugvinden waaromhet spek in een kaasdoek moet drogen. Kan dit ook zonder dat doek in de koelkast?
Dag Han,
bedankt voor je reactie! Het kaasdoek is om hygiënische redenen. Op deze manier is het wat beschermd van de omgeving. Ik kan niet met zekerheid zeggen dat het zonder even goed kan, maar in die gevallen kies ik liever voor de veiligste optie.
Groeten en veel succes!
Simon
Zou u aanraden om de zwoerd/vel aan het stuk buikspek te laten of toch af te snijden?
Alvast bedankt voor uw inzicht/antwoord.
Dag Vincent,
voor dit recept zou ik het zwoerd verwijderen. Ik laat het er enkel aan bij warme spekbereidingen waarbij de temperatuur hoog genoeg is om de zwoerd krokant te bakken. Anders heb je enkel een taai lapje zonder meerwaarde aan je vlees. Je kan er zoals op de foto’s hier wel een laagje vet aan laten. Dit krijgt een heerlijke smaak na het roken.
Met vriendelijke groeten,
Simon
Klopt jouw calculatie nitraatzout nu welnof niet? According naar de post uit 2017? Graag zie ik je reactie tegemoet
Gr Ivo
Hey Ivo,
De verwarring in dat gesprek zat hem in het gegeven dat in het buitenland sterkere versies bestaan met meer nitriet. Hier in België is dat sowieso al streng gelimiteerd.
Ik leef in elk geval nog en voor zover ik weet ben ik kerngezond :). Volgens mij had die gast het ook wat moeilijk toe te geven dat hijzelf niet goed gelezen had. Maar goed…
Het is een recept dat al door velen is gemaakt en nog nooit geen klachten gehad.
Voor de zekerheid ook nog eens gecheckt en de Nederlandse fabrikant raadt aan niet meer dan 40 gr. per kg vlees te gebruiken. Daar blijf dit recept met 12 gram per kg vlees ruim onder. Dus zouden zij nog fouter moeten zijn in hun berekening 😉
Mvg, Simon