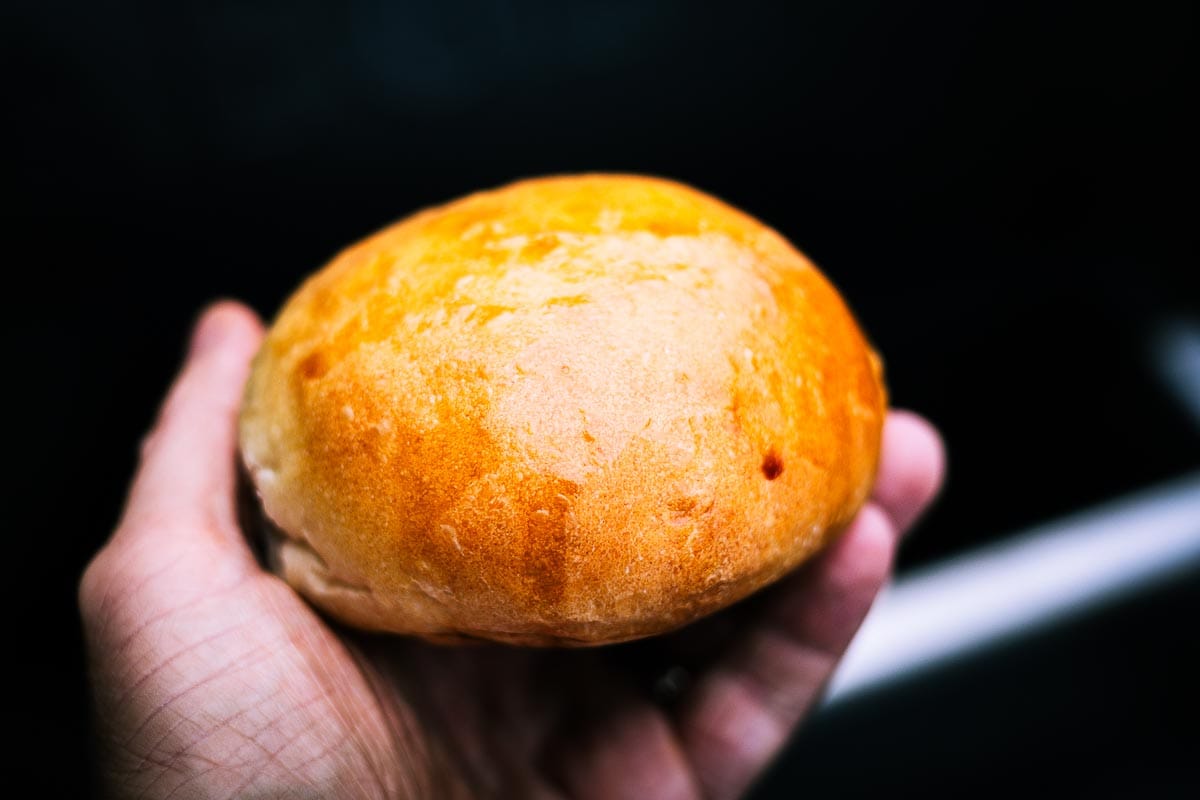
A good burger deserves a good bun. The soft, slightly sweet rolls from a burger restaurant can be surprisingly hard to find at the supermarket. So we decided to make our own. Or, to give credit where it belongs, my wife did the baking: she is the best baker in our house, and she was happy to share the recipe. These homemade hamburger buns come out soft and airy, with a golden top and enough structure for a juicy burger. We bake them on the grill, but your oven works too.
This post may contain Amazon affiliate links. As an Amazon Associate, I earn from qualifying purchases at no additional cost to you. All opinions are personal and honest.
Homemade hamburger buns: the short answer
Mix a dough with bread flour, milk, water, butter, egg, sugar, salt, and 1¼ teaspoons of active dry yeast. Knead until smooth, let it roughly double in size, shape eight buns, and give them a second rise. Brush with egg yolk and milk, then bake with the lid closed over indirect heat at 425°F (220°C) for about 15 minutes. A conventional oven at the same temperature also works. Allow roughly 2 hours 35 minutes for mixing, proofing, and baking, plus cooling. The dough may need longer in a cool room.
Why make your own homemade hamburger buns?
Making burger buns can feel like an extra job before the grill is even lit. Once you try it, though, you notice how much the bread contributes. This is the recipe we are happiest with so far: a soft, springy crumb, a little sweetness, and a thin crust that does not fight with the filling.
- Texture that suits a burger: the crumb is light but has enough structure to hold the patty and its juices. Lightly toasting the cut sides helps when your filling is particularly juicy.
- Control over the ingredients: you know what goes into the dough and can adjust the recipe to your taste. These buns do not rely on added preservatives to stay fresh.
- Room to experiment: sesame or poppy seeds change the finish. You can also try replacing a little of the bread flour with whole wheat flour or using honey instead of sugar, although those changes can affect the dough and its rise.
- Freshly baked flavor: warm bread brings something to a burger that a packet of rolls often misses. Give the buns a chance to cool before slicing so the crumb has time to settle.
There are plenty of good burger bun recipes. This one works for our family, and I am always interested in hearing what you do differently. A small change to the bread can change the whole burger.
Ingredients for soft burger buns
The formula for these homemade hamburger buns matters as much as the ingredient list. Keep the original amounts together instead of adding flour until the dough feels completely dry. It is good to know that this recipe was originally developed using precise European metric units (grams and milliliters). For the best and most accurate baking results, use these metric measurements if possible, or weigh your ingredients very precisely if you are using alternative units.
The table below gives the dough ingredients for eight buns. The yolk and milk for brushing are separate from the egg and milk in the dough; the complete recipe card includes both groups.
| Ingredient | Original metric amount | US equivalent |
|---|---|---|
| Bread flour | 450 g | 15.9 oz |
| Water | 125 ml | 4.23 fl oz |
| Milk | 125 ml | 4.23 fl oz |
| Butter | 30 g | 1.06 oz |
| Egg | 1 | 1 |
| Active dry yeast | 1¼ tsp | 1¼ tsp |
| Granulated sugar | 1 tbsp | 1 tbsp |
| Salt | 1 tsp | 1 tsp |
⚖️ Extra Tip: Weigh for Precision
Baking is science. The European metric measurements in this recipe ensure exact consistency. For the best result, use a digital kitchen scale that lets you switch seamlessly between metric and imperial units.
Check out recommended kitchen scale →Bread flour or all-purpose flour?
In the original Belgian recipe we use strong white bread flour. For an American kitchen, bread flour is the closest practical choice. Its higher protein content helps develop an elastic dough that traps the gas produced by the yeast. That gives the buns room to rise while keeping them sturdy enough for a burger.
All-purpose flour can also work, although the dough and final texture will depend on the brand. If you want to try whole wheat flour, start by replacing a small amount and keep it to no more than about one-third of the flour. Expect a different dough and a less delicate crumb. Weigh the flour if you can: 450 g is roughly 3¾ US cups when the flour weighs 120 g per cup, but a firmly packed cup can contain much more.
Milk, butter, and egg soften the crumb
This is a lightly enriched dough. Milk, butter, and egg give it a softer bite and fuller flavor than a simple flour-and-water dough. The water and milk are both part of the recipe, so keep their balance rather than adding extra liquid to activate the yeast. The butter should be soft enough to mix through the dough.
Use the listed amount of yeast
Use 1¼ teaspoons active dry yeast, not a whole standard packet by default. Stir it into the recipe’s lukewarm water and leave it for about ten minutes. Check the package directions for the particular yeast you use, and avoid hot liquid. Fresh, properly stored yeast and patient proofing matter more than rushing the dough into a very warm place.
Salt helps control fermentation and gives the buns flavor. At normal bread-making quantities, briefly mixing salt and yeast together does not kill the yeast. There is no need to panic if they touch while you are mixing. Excessively hot liquid and old or poorly stored yeast are more useful things to check when the dough will not rise.
Kneading: look for a smooth, elastic dough
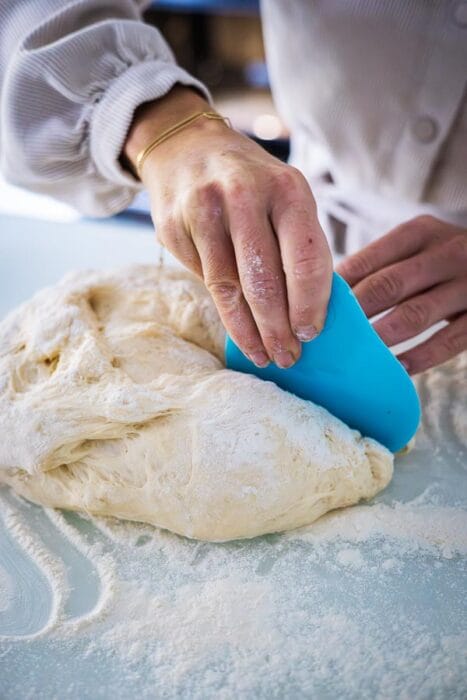
Kneading, is essential for the quality of your homemade hamburger buns, it helps develop the gluten network that holds the dough together and traps air during the rise. You can do it by hand or use a stand mixer (like this one on Amazon) fitted with a dough hook. The goal is the same: a smooth, elastic dough that stretches instead of tearing immediately.
- By hand: push the dough away with the heel of your hand, fold it back, and turn it. Repeat for around 10–15 minutes, using the dough’s condition as your guide.
- With a stand mixer: use the dough hook at the speed recommended by the manufacturer for bread dough. Around 8–10 minutes is a useful starting point. Stop to check the dough rather than assuming that more mixing is always better.
- The windowpane test: gently stretch a small piece of dough between your fingers. It should form a thin, partly translucent sheet before tearing. If it tears immediately, let it rest briefly and check again; it may need more kneading.
A little tackiness is normal. Adding a lot of flour to make the dough perfectly dry can give you a heavier bun. If a mixer makes the dough noticeably warm or the dough starts losing its structure, stop and assess it. You are looking for enough development to hold the rise, not the longest possible kneading time.

Give the dough time for two rises
The first rise lets the dough build volume and flavor. The second gives the shaped buns their final puffiness. Neither stage is helped by checking the clock every two minutes. Watch what the dough actually does.
The first rise: roughly 90 minutes
Put the dough in a lightly greased bowl and cover it with a damp kitchen towel. Leave it in a warm, draft-free place until it roughly doubles in size, usually around 1½ hours. A warm kitchen counter is fine. In colder weather, a slightly warmed, switched-off oven can help, provided it is only gently warm, around 85°F (30°C), rather than hot.
Shape eight buns, then proof again
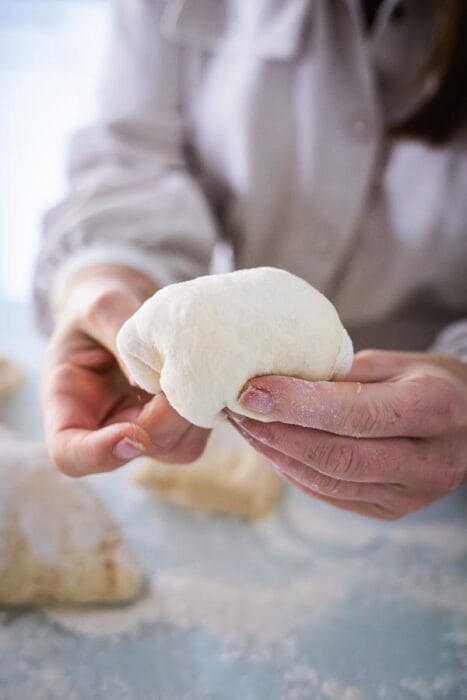
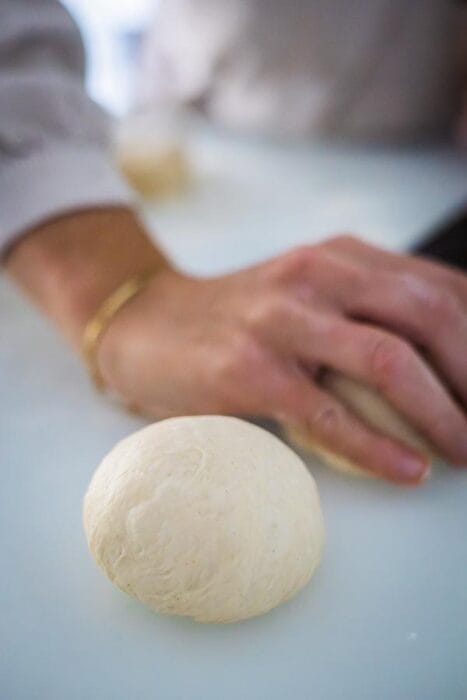
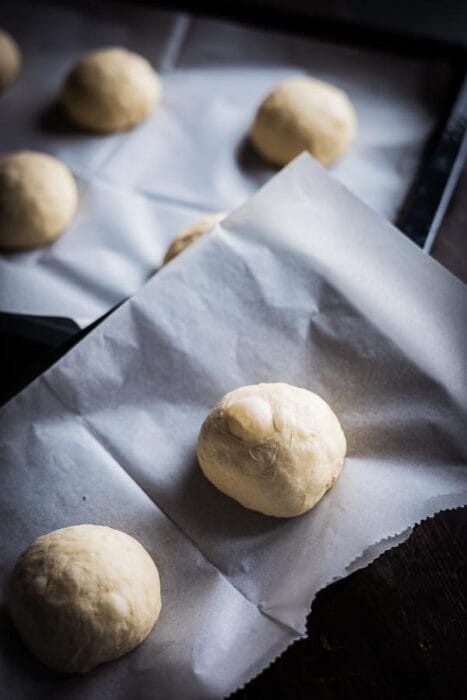
Gently release the biggest air bubbles and divide the dough into eight equal pieces. Roll each piece into a smooth ball, then place it on a parchment paper with room to expand.
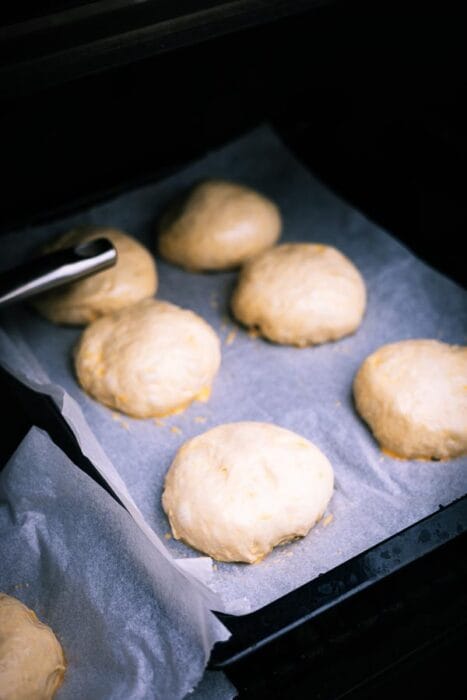
Cover loosely and leave the buns for a second rise, usually around 20–30 minutes. They should look visibly fuller and feel light. A gentle finger press should spring back slowly. If the dough springs back straight away, it may need more time. If it feels fragile or starts deflating, avoid stretching the proof further. The room temperature and the dough matter more than a fixed minute count.
Egg wash for a golden, glossy top on your buns
Whisk the separate egg yolk with a few tablespoons of milk. Brush a thin, even layer over the risen buns with a soft pastry brush. Gentle strokes keep you from pressing the air out of the dough. The egg wash encourages a golden color and glossy finish as the buns bake.
Sesame seeds or poppy seeds are optional. Sprinkle them on after brushing, before the buns go into the grill or oven. Keep the layer of egg wash light: you do not need it pooling around the base of each bun.
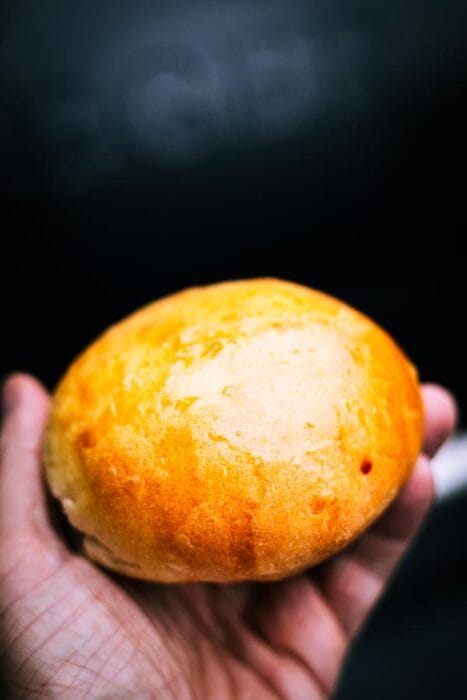
How to bake homemade hamburger buns on the grill
Think of the grill as an outdoor oven. The buns need heat around them, a closed lid, and protection from fierce heat underneath. Putting them directly over the fire can burn the bottoms before the centers are baked. My guide to direct and indirect grilling explains how to build that protected cooking zone.
Set up indirect heat at 425°F (220°C)
- Kettle or charcoal grill: arrange the coals to the sides and leave a clear indirect area for the baking sheet.
- Kamado: install the (fitting) heat deflector and keep the baking sheet above it. An additional baking stone can help with your setup, but a hot stone alone does not replace a deflector.
- Pellet grill: use its normal indirect configuration with the heat diffuser in place. Check the position of the hottest areas so the sheet is not exposed to a strong hot spot.
- Gas grill: light the burners away from the baking sheet and leave the burners directly beneath it off. Preheat with the lid closed.
Preheat the grill to 425°F (220°C), measured near the baking area where practical. If you use a baking stone, warm it with the grill and protect it from direct fire. It should not be heated as aggressively as a stone used for high-temperature pizza. Check the heat rating of your parchment, and trim loose overhang so it stays away from the fire.
Bake for about 15 minutes with the lid closed
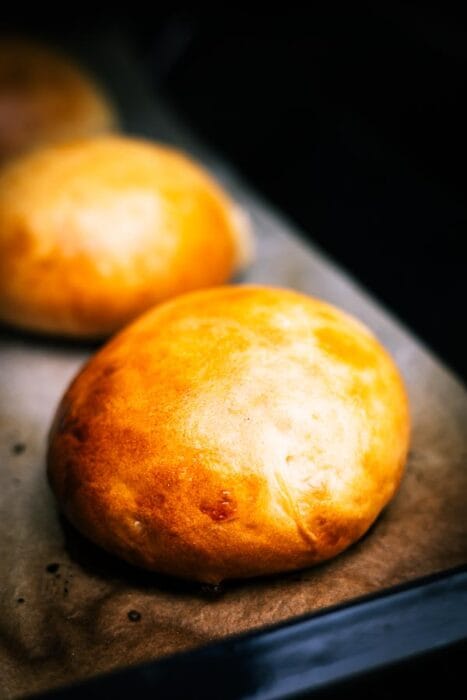
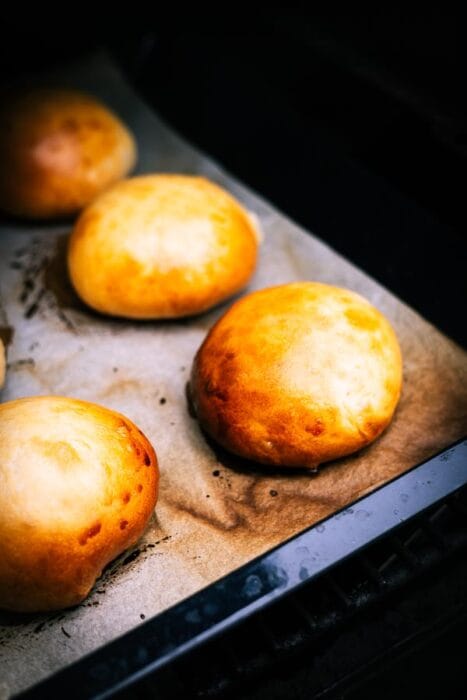
Put the baking sheet in the indirect zone and close the lid. Bake for around 15 minutes, until the tops are golden and the buns feel baked through. If your grill has a pronounced hot spot, rotate the sheet once rather than repeatedly opening the lid.
Indirect heat lowers the risk of scorched bottoms, but it does not make burning impossible. A baking sheet, deflector, and sensible distance from the heat source all help. Do not add a large amount of smoking wood just because you are baking on the BBQ; the aim here is a soft burger bun not a smoke bomb.
Can you bake these buns in the oven?
Yes. Preheat a conventional oven to 425°F (220°C) and use the same parchment-lined baking sheet. Start checking the buns shortly before the 15-minute mark, since ovens and grills distribute heat differently. My original recipe uses the same temperature and approximate baking time for both. A steady oven can be the easier choice while you concentrate on grilling the burgers outside.
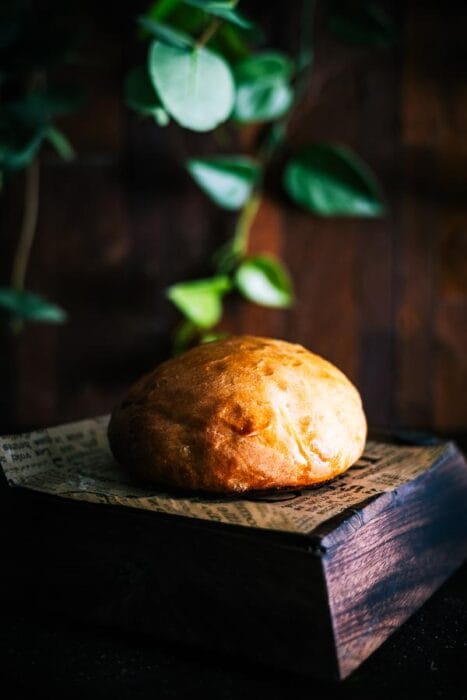
Make ahead, store, and freeze the buns
Freshly baked is hard to beat, but you can make the buns ahead. Let them cool before packing them airtight. For the best texture, use them within one to two days at room temperature, or freeze the cooled buns and aim to use them within about three months. Those are quality guidelines; discard bread if it develops mold or an off smell.
Thaw the baked buns in their wrapping, then warm them briefly if needed. Slice them once thawed and lightly toast the cut sides before filling. I have successfully frozen the baked buns; freezing this particular dough before baking is something I have not tested (but works well with pizza dough), so I would start with the baked-bun method.
If you enjoy baking outside, beer bread on the grill is another project to try. For a soft, steamed bread rather than a baked bun, there is also my homemade bao buns recipe.
What burger are you putting on the grill?
Have you tried making these homemade hamburger buns? Leave a comment and an honest star rating below. It helps fellow BBQ lovers and shows me which recipes I should expand on next.
Feel free to share your result and tag @the_bbq_bastard.
Instagram ·
Facebook ·
Pinterest
Recipe: homemade hamburger buns

Homemade hamburger buns on the grill (or in the oven)
Equipment
- Mixing bowl
- Stand mixer optional; hand kneading also works
- Dough hook if using a stand mixer
- Baking sheet
- Parchment paper
- Kitchen towel
- Thermometer optional, for checking the liquid or grill temperature
- Grill with a lid and an indirect cooking zone; a conventional oven also works
Ingredients
For the dough
- 15.9 oz bread flour Weigh the flour for the most consistent dough.
- 1.25 tsp active dry yeast
- 1.06 oz butter softened
- 1 tbsp granulated sugar
- 1 tsp salt use the same fine salt consistently
- 1 egg beaten; for the dough
- 4.23 fl oz water lukewarm. Use this water to activate the yeast, not extra water.
- 4.23 fl oz milk lukewarm; for the dough.
For the egg wash
- 1 egg yolk separate from the egg in the dough
- 2-3 tbsp milk enough to loosen the yolk for brushing; separate from the dough milk
Optional topping
- sesame seeds or poppy seeds optional, to sprinkle over the egg wash
Instructions
Mix and knead the dough
- Stir the active dry yeast into the listed lukewarm water and leave for about 10 minutes. Follow the yeast manufacturer’s directions and avoid hot liquid. Do not add extra water.
- Combine the bread flour, sugar, and salt in a mixing bowl. Add the softened butter, beaten egg, yeast water, and lukewarm milk. Mix until the ingredients come together.
- Knead by hand for about 10–15 minutes, or use a stand mixer fitted with a dough hook at the manufacturer’s recommended dough speed for around 8–10 minutes. The dough should be smooth, elastic, and able to stretch into a thin windowpane without tearing immediately.
First rise, shaping, and final proof
- Put the dough in a lightly greased bowl and cover with a damp kitchen towel. Leave in a warm, draft-free place until roughly doubled in size, usually around 90 minutes. A cool room can take longer.
- Gently release the largest air bubbles and divide the dough into 8 equal pieces. Shape each piece into a smooth ball and place on a parchment-lined baking sheet with room to expand.
- Cover loosely and let the shaped buns rise for around 20–30 minutes, until visibly puffy. A gentle finger press should spring back slowly. Watch the dough rather than the clock.
Prepare the grill or oven
- Toward the end of the second rise, preheat the grill for indirect cooking to 425°F (220°C), with no active fire or burner directly under the baking sheet. On a kamado, use a heat deflector; on a kettle, put the coals to the sides; on a pellet grill, use the normal diffuser setup. For the oven method, preheat a conventional oven to 425°F (220°C).
- Whisk the separate egg yolk with 2–3 tablespoons of milk. Gently brush a thin, even layer over the risen buns. Add sesame seeds or poppy seeds if you want. Check that the parchment is rated for the baking temperature and trim loose overhang.
Bake and serve
- Bake the buns on their baking sheet over indirect heat with the grill lid closed, or in the conventional oven, for about 15 minutes, until golden and baked through. The original recipe also checks for a hollow sound when tapping the underside. Start checking the oven batch shortly before 15 minutes and rotate the sheet if your cooker browns unevenly.
- Transfer the buns to a cooling rack and let them cool before slicing. Lightly toast the cut sides if desired, then fill with your favorite burger or BBQ filling.
Notes
The buns are ready. What goes inside?
The buns went down well at home: soft, airy, and full of flavor. My youngest son already had a filling in mind and asked me to recreate the Messi burger. That is the fun of making your own bread: the next question is what you are going to build around it.
For a filling you can make ahead, try my quick pulled pork. For something inspired by a Belgian butcher’s counter, my Swiss cheese meat patties give you another option. If you want to work on the meat mixture itself, read the homemade ground meat guide first, then choose a blend that suits your burger.
The broader burger ideas from my original article are still worth exploring. They range from classic beef to spicy, poultry, fish, and Mediterranean combinations. The linked recipes in the expandable list below are in Dutch; use your browser’s translation if you want to browse that part of the archive.
More burger ideas from my Dutch archive
- Start with the basics: Basic burger, 15 creative burger recipes.
- Beef classics and winter flavors: Messi burger, Winter burger.
- Spicy and international ideas: Taco burger, Mole poblano burgers, Korean dragon burger.
- Poultry: Korean fried chicken burger, Teriyaki chicken burgers, Crispy turkey burger, Duck burger.
- Fish and Mediterranean flavors: Salmon burger, Smoked salmon burger, Smoked sturgeon burger, Feta burger, Turkish lamb burger, Mediterranean beer-can burger.
- A cookbook-inspired burger: Lost in France burger and Het Burgerboek.
Frequently asked questions about hamburger buns
Is it worth making hamburger buns from scratch?
If you enjoy a soft, freshly baked bun and want control over the ingredients, yes. You do need time for the dough to rise. The recipe is straightforward enough to make the bread ahead and concentrate on the burgers when your guests arrive.
Are homemade hamburger buns difficult to make?
The main jobs are mixing, kneading, shaping, and waiting for the dough to rise. A stand mixer makes kneading easier, but you can do it by hand. Look for an elastic dough and visibly puffy buns instead of treating every timing as exact.
What flour is best for hamburger buns?
Bread flour is a practical choice for this recipe because it helps build a dough that rises well and holds a juicy filling. All-purpose flour can also work. Weigh the flour for consistency; cup measurements vary with the flour and how it is filled.
Why are my hamburger buns dense?
Common causes include inactive yeast, too much added flour, insufficient kneading, or cutting the first or second rise short. A cold kitchen can slow things down. Check that the dough grows and becomes puffy before baking.
How do I keep hamburger buns soft?
Use the milk, butter, and egg in the recipe rather than treating it as a lean bread dough. Avoid adding a lot of extra flour and do not overbake. Let the buns cool before packing them airtight; briefly warming them before serving can improve their texture.
Can I make hamburger buns ahead of time?
Yes. Bake them a day ahead, let them cool, and pack them airtight. You can lightly warm them or toast the cut sides before filling. For longer storage, freeze the baked buns rather than leaving them on the counter.
How long do homemade burger buns keep?
For the best texture, use airtight, room-temperature buns within about one to two days. Freeze cooled buns for longer storage and aim to use them within about three months for quality. Discard any bread with mold or an off smell.
Why do hamburger buns need two rises?
The first rise lets the mixed dough build volume and flavor. Shaping redistributes the larger air pockets. The second rise gives the shaped buns time to become puffy before the surface sets in the grill or oven.
Can I bake these buns in a regular oven?
Yes. Use a conventional oven preheated to 425°F (220°C) and start checking shortly before the approximate 15-minute baking time. The grill version uses indirect heat with the lid closed; the oven version uses the same dough and egg wash.
Can I freeze the dough before baking?
I have not tested freezing this particular dough before baking. Freezing the baked buns has worked for me, so that is the method I recommend here. Let them cool, wrap airtight, freeze, and thaw before warming or toasting.


